Summarise this article with:
 Claude
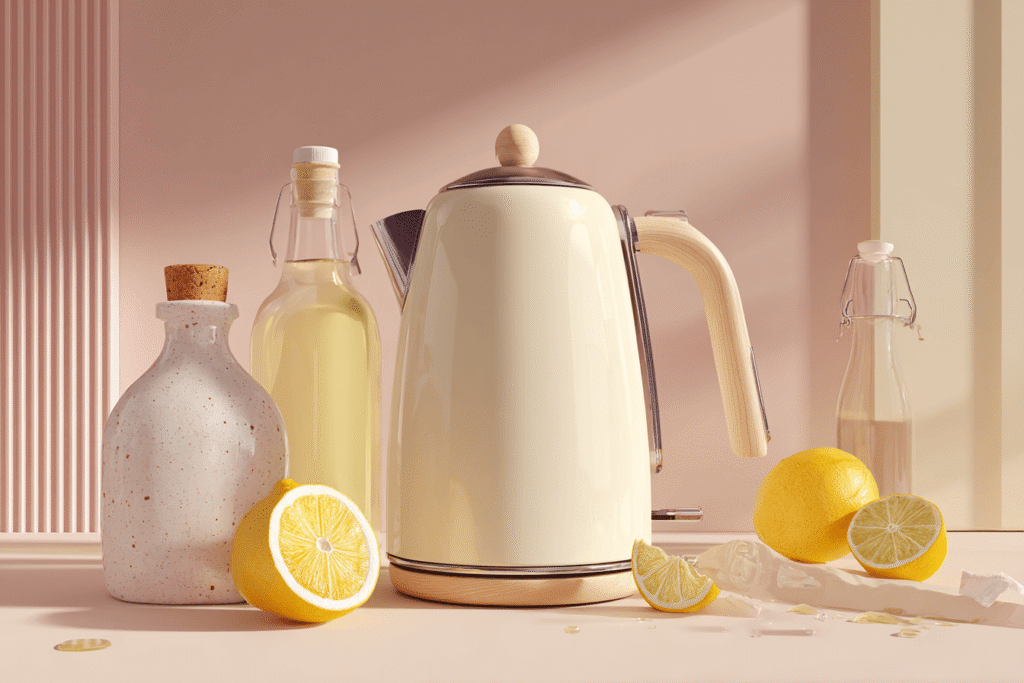
That chalky white buildup inside your kettle isn’t just unsightly – limescale affects the taste of your brew and makes your kettle work harder than necessary. We’ve gathered the most effective descaling methods using household items you probably already have. Whether you prefer the classic vinegar approach or want to try natural alternatives like lemon juice, we’ll guide you through each technique step by step.
What is limescale and why does it matter?
Understanding limescale buildup
Hard water is the culprit behind that stubborn white residue coating your kettle’s heating element. When you boil water containing dissolved minerals like calcium carbonate and magnesium, these substances separate from the water and stick to surfaces as limescale forms.
Here’s what happens inside your kettle:
- Heat triggers mineral separation – boiling causes dissolved calcium and magnesium to precipitate out
- Residue accumulates over time – each boiling session leaves behind more mineral deposits
- Worst cases see thick, crusty layers that flake into your brew
This buildup acts like an insulator around your heating element, forcing it to work harder and consume more energy. The chalky deposits also affect water taste, giving your tea or coffee an unpleasant mineral flavour that no amount of sugar can mask.
Signs your kettle needs descaling
Spotting the warning signs early saves you from worst cases where limescale becomes stubborn and hard water damage affects your kettle’s performance. Here are the telltale signs your kettle is crying out for attention:
Visual clues you can’t miss:
- White, chalky deposits coating the inside walls
- Crusty buildup around the heating element or filter in the spout
- Cloudy residue floating in freshly boiled water
Performance changes:
- Longer boiling times than usual
- Unusual crackling or rumbling noises during heating
- Small amount of white flakes appearing in your cup
Taste and smell indicators:
- Metallic or off-putting taste in your brew
- Strange odours when boiling water
Don’t wait until you need to grab a damp cloth and scrub away thick deposits. Regular checks help you catch limescale before it becomes a major cleaning challenge.
Is limescale dangerous to your health?
Good news – limescale poses no direct threat to your health. The white chalky deposits are simply calcium carbonate and magnesium, minerals that occur naturally in many bottled waters you’d buy at your local supermarket.
Quick health facts:
- Safe to consume – these minerals are non-toxic and harmless in small amounts
- Natural minerals – your body actually needs calcium and magnesium for healthy bones and muscles
- No health risks – drinking water with limescale flakes won’t cause kidney stones or other problems
However, there are practical concerns:
- Taste issues – limescale can make your brew taste chalky or bitter
- Hygiene matters – old buildup might harbour bacteria if left uncleaned for months
- Appliance efficiency – your kettle works harder, costing you more on energy bills
The real problem isn’t health – it’s that limescale makes your perfect cuppa taste rubbish. Regular cleaning keeps both your kettle and your brew in top condition.
Before you start: safety and preparation
Essential safety tips for descaling
Before you grab that bottle of white vinegar, take a moment to protect yourself and your kettle. Safety comes first when working with descaling solutions and hot water.
Power down completely:
- Unplug your kettle from the mains before starting any cleaning
- Allow hot kettles to cool fully – no rushing this step
- Never descale while the heating element is still warm
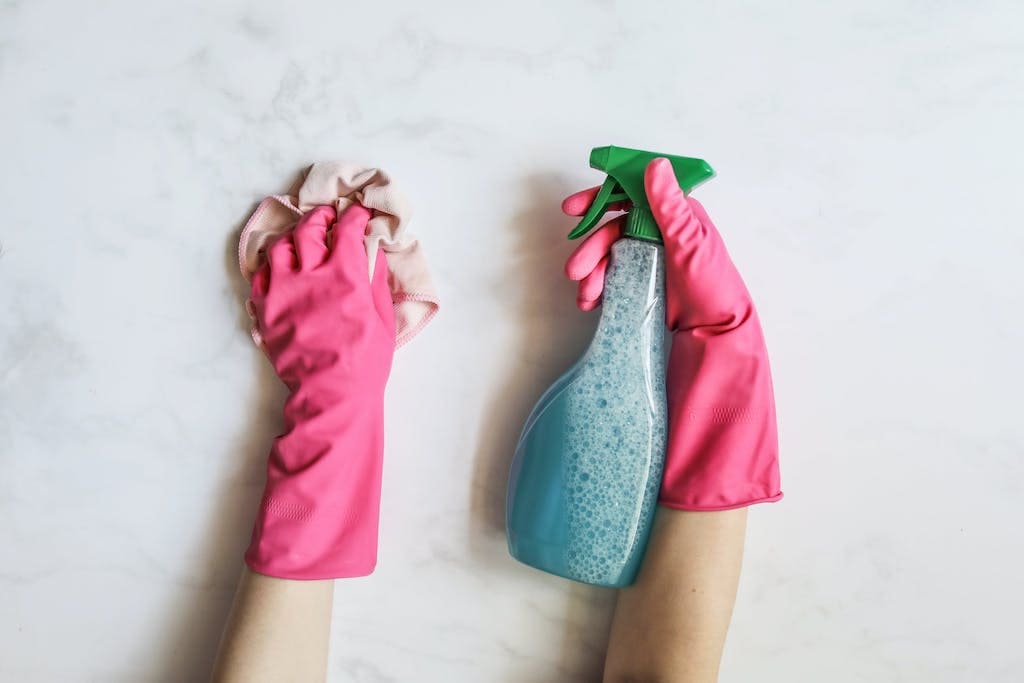
Handle solutions with care:
- Work in a well-ventilated area to avoid inhaling fumes
- Wear rubber gloves when using citric acid or commercial descalers
- Keep a damp cloth nearby for immediate spill cleanup
Protect your kitchen sink and surfaces:
- Place towels around your work area to catch splashes
- Pour solutions slowly to prevent aggressive bubbling
- Never exceed your kettle’s maximum fill line during the process
Check your model first – some kettles have specific descaling instructions in their manual that override general advice.
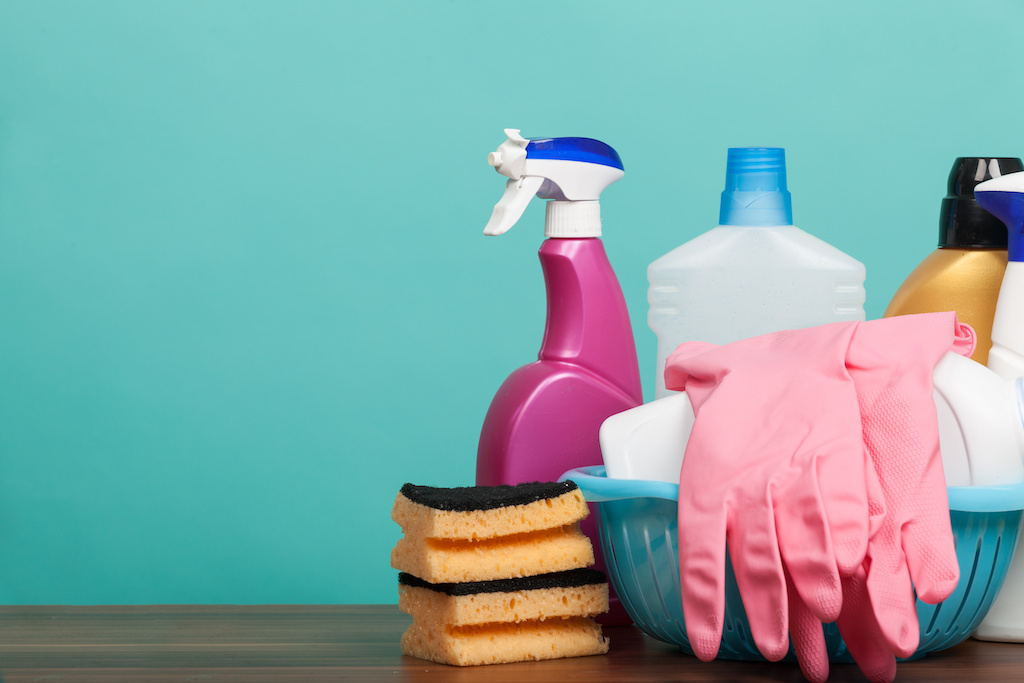
What you’ll need for each method
Different descaling methods require different materials – but the good news is you probably have most items at home already.
Here’s what you’ll need for each effective way to tackle limescale:
| Method | What You’ll Need | Measuring Guide |
|---|---|---|
| White Vinegar | White vinegar, water, damp cloth | Equal parts vinegar and water |
| Citric Acid | Citric acid powder, water | 1-2 tablespoons per half-full kettle |
| Lemon Juice | Fresh lemons or bottled juice, water | Half a lemon or 20ml juice |
| Baking Soda | Tablespoon of baking soda, water | 1 tablespoon per half-full kettle |
| Commercial | Descaling sachets from local supermarket | Follow packet instructions |
For all methods, you’ll also want rubber gloves and towels for cleanup. The mild acidity in these solutions does the hard work – you just need to measure correctly and let them sit.
Pro tip: Check if your kettle has a filter in the spout before starting – you might need an old toothbrush to clean it separately.
How do you remove limescale from a kettle ?
White vinegar method: the classic approach
White vinegar remains the most trusted descaling solution for British households – and there’s a reason your gran swore by it.
This classic approach uses the mild acidity of distilled white vinegar to dissolve limescale without harsh chemicals. You’ll find it works brilliantly on everything from light scaling to stubborn buildup that’s been lurking for months.
Why white vinegar wins:
- Cost-effective – under 50p from any local supermarket
- Safe and natural – no toxic fumes or dangerous chemicals
- Readily available – probably sitting in your kitchen cupboard right now
- Gentle on kettles – won’t damage heating elements or plastic components
The beauty of this method lies in its simplicity. Equal parts water and white vinegar create the perfect solution strength – strong enough to tackle limescale, gentle enough to use regularly. Unlike commercial descalers, you won’t need special ventilation or worry about residue affecting your brew’s taste.
Perfect for regular maintenance – use this method monthly in hard water areas to prevent serious buildup.
Citric acid descaling: powerful and eco-friendly
Citric acid powder transforms kettle descaling into an eco-conscious choice that delivers professional results without the environmental guilt.
This crystallised powerhouse works faster than vinegar and leaves no lingering odours – making it perfect for households where someone always has a brew on the go. You’ll find citric acid in the cleaning aisle of your local supermarket for under £2, and a small amount goes a long way.
Why citric acid wins the eco-friendly race:
- Biodegradable and food-safe – the same stuff found in your morning orange juice
- No harsh fumes – work in any kitchen without opening windows
- Gentle on all kettle materials – safe for plastic, steel, and glass models
- Quick action – dissolves limescale in 15-20 minutes, not hours
The science bit: Citric acid’s natural properties break down calcium and magnesium deposits more effectively than household vinegar, while remaining completely safe for your plumbing and the environment.
Perfect for busy households – mix, boil, wait, rinse. Job done, and your conscience stays as clean as your kettle.
Lemon juice technique: fresh and effective
Fresh lemons bring zesty cleaning power straight from your fruit bowl – and the results will leave you wondering why you ever bought expensive descaling products.
The citric acid in lemon juice breaks down limescale naturally while leaving your kettle smelling gorgeous. Unlike vinegar’s pungent fumes, lemon creates a fresh kitchen atmosphere that makes the whole process rather pleasant.
What makes lemon juice brilliant:
- Zero harsh chemicals – completely food-safe and gentle on all kettle materials
- Dual-purpose cleaning – tackles limescale whilst acting as a natural bleach for stains
- Pleasant experience – no need to evacuate the kitchen during cleaning
- Budget-friendly – one lemon costs pennies and handles multiple descaling sessions
Whether you squeeze fresh lemons or grab bottled juice from the cupboard, both work equally well. The key lies in lemon’s natural acidity doing the heavy lifting while you simply add water and let it work its magic.
Baking soda solution: gentle yet thorough
You probably have this miracle descaler sitting in your kitchen cupboard right now – and it’s gentler on your kettle than you might think.
Baking soda works differently from acidic descalers, using its mild abrasive properties to physically lift limescale whilst remaining completely safe for all kettle materials. The beauty lies in its versatility – create a paste for stubborn spots or dissolve it in water for a gentler approach.
Why baking soda deserves a spot in your cleaning routine:
- Super gentle – won’t scratch delicate surfaces or damage heating elements
- Odour-free – no lingering smells to worry about afterwards
- Dual action – dissolves deposits and neutralises any acidic residue from previous cleans
- Always available – costs under £1 and lasts for months
Mix one tablespoon with water, boil for 10 minutes, then let it sit. The combination of heat and gentle abrasion tackles limescale without the harsh effects of stronger chemicals.
How to descale with white vinegar
Step-by-step vinegar descaling process
Right, let’s get your kettle sparkling with this foolproof method – no guesswork, just results.
Here’s exactly what to do:
- Unplug your kettle and check it’s completely cool
- Fill halfway with equal parts white vinegar and water – roughly one cup of each works perfectly
- Bring the solution to a rolling boil then switch off immediately
- Let it sit for 30-60 minutes – the longer you leave it, the better it works on stubborn deposits
- Pour out the solution and give the inside a gentle wipe with a soft cloth
- Rinse thoroughly with fresh water at least three times to remove all vinegar residue
Pro tip: For heavy limescale around the spout, soak kitchen paper in vinegar and wrap it around the affected area for 20 minutes.
Your kettle will look like new, and you’ve just saved money on expensive descaling products.
Removing vinegar taste and smell
Nobody fancies vinegar-flavoured tea – but don’t panic if your kettle still smells like a chip shop after descaling.
The lingering vinegar taste disappears with a few simple rinses, and we’ve got the quickest methods to get your kettle back to brewing perfect cuppa. Fill your kettle with fresh water and boil it twice, discarding the water each time – this removes most residual vinegar.
For stubborn smells, try these proven methods:
| Method | Time Required | Effectiveness |
|---|---|---|
| Baking soda rinse | 15 minutes | Excellent for neutralising odours |
| Lemon juice boil | 30 minutes | Removes smell + adds fresh scent |
| Multiple water boils | 10 minutes | Quick solution for light residue |
The baking soda trick works brilliantly – add one teaspoon to a full kettle of water, boil for 10 minutes, then rinse thoroughly. Your next brew will taste exactly as it should.
Citric acid descaling guide
Mixing the perfect citric acid solution
Getting the concentration spot-on makes all the difference – too weak and you’ll waste time, too strong and you risk damaging delicate kettle components.
The magic number sits around 1-2 tablespoons per 500ml of water, but your water hardness and limescale severity determine the exact amount needed.
| Limescale Level | Citric Acid Amount | Water Volume | Soaking Time |
|---|---|---|---|
| Light buildup | 1 tablespoon | 500ml | 15-20 minutes |
| Moderate scaling | 2 tablespoons | 500ml | 20-30 minutes |
| Heavy deposits | 3 tablespoons | 500ml | 30-45 minutes |
Always dissolve the citric acid in hot water first – cold water takes ages to break down the crystals properly. Fill your kettle halfway, bring to the boil, then add your measured citric acid and watch it fizz as it gets to work on those stubborn deposits.
Best practices for citric acid method
Temperature and timing make citric acid descaling foolproof – but a few insider tricks separate amateur attempts from professional results.
Follow these proven techniques for brilliant results:
- Never add citric acid to cold water – dissolve it in freshly boiled water for maximum effectiveness
- Keep the kettle lid open during soaking – you’ll see the fizzing reaction that confirms it’s working properly
- Don’t rush the process – patience beats elbow grease every time with citric acid
- Use a soft cloth for wiping – avoid anything abrasive that might scratch your kettle’s interior
- Always do a taste test boil – one final rinse and boil ensures no citric residue remains
The beauty of citric acid lies in its gentleness – you can safely repeat the process if needed without worrying about damage to seals or heating elements.
Perfect for monthly maintenance routines that keep your kettle performing like new.
Using lemon for natural descaling
Fresh lemon vs bottled lemon juice
Both fresh and bottled lemon juice tackle limescale effectively – but choosing the right one depends on what you’ve got in your kitchen and how often you descale.
The citric acid does the actual work in both cases, though there are practical differences worth knowing about.
| Fresh Lemon | Bottled Lemon Juice |
|---|---|
| Higher acidity levels – more potent descaling power | Consistent acid concentration – reliable results every time |
| No preservatives – completely natural approach | Ready to use – grab and go convenience |
| Must use quickly – goes off within days | Long shelf life – always available when needed |
| Requires prep time – juicing and straining needed | Straight from bottle – no preparation required |
The verdict? Fresh lemons pack more punch for stubborn limescale, while bottled juice offers unbeatable convenience for regular maintenance. Either way, you’ll get a sparkling clean kettle without harsh chemicals.
Lemon descaling technique
Start with a cold, empty kettle – this gives the lemon juice maximum contact time with limescale deposits before dilution.
Here’s your simple lemon descaling process:
- Squeeze half a lemon directly into the kettle (about 2 tablespoons of juice)
- Add the lemon halves to the kettle for extra cleaning power
- Fill halfway with cold water and swirl gently to distribute the juice
- Bring to the boil and let it bubble for 2-3 minutes
- Switch off and leave for 30 minutes – watch the limescale start dissolving
- Pour out the mixture and give the interior a gentle wipe
- Rinse thoroughly with fresh water until no citrus scent remains
For stubborn deposits, repeat once more – the natural acids need time to work their magic on heavy buildup. Your kettle will smell wonderfully fresh, and you’ve just used the most eco-friendly descaling method possible.
Commercial descaling products
When to choose shop-bought descalers
Sometimes natural methods just don’t cut it – and there’s no shame in reaching for professional-strength descaling products when your kettle needs serious help.
Commercial descalers shine in these specific situations:
- Heavy limescale buildup – when natural acids can’t penetrate thick, stubborn deposits
- Time constraints – you need results in 15 minutes rather than multiple soaking sessions
- Hard water areas – where mineral content overwhelms gentler home remedies
- Professional kitchens – consistent, reliable results matter more than cost savings
- Delicate kettle materials – some manufacturers recommend specific commercial products
The trade-off comes down to power versus patience – shop-bought descalers work faster and tackle tougher jobs, but cost more than pantry staples. If your kettle looks like it’s wearing a white coat of limescale, commercial products deliver the muscle you need.
Using descaling powder safely
Descaling powder packs serious limescale-busting power – but handling it properly keeps both you and your kettle safe from harm.
Always read the packet instructions first – different brands have varying concentrations that affect mixing ratios and contact time.
Key safety steps for powder descaling:
- Wear rubber gloves – protects your skin from irritation during mixing and pouring
- Work in a well-ventilated area – avoid inhaling powder particles when opening sachets
- Never boil the powder solution – heat activates it, but boiling can damage your kettle’s seals
- Mix powder in cold water first – prevents clumping and ensures even distribution
Dissolve one sachet in 500ml of water, pour into your kettle, and let chemistry do the work – usually 15-30 minutes depending on limescale severity.
After treatment, rinse thoroughly and boil fresh water twice – this eliminates any residual powder taste before your next brew.
Liquid descaler application
Liquid descalers offer the perfect balance between convenience and control – no measuring powder or waiting for tablets to dissolve.
Follow the manufacturer’s dilution ratios precisely – most liquid descalers work best when mixed correctly with water before application.
| Kettle Size | Liquid Descaler | Water | Soaking Time |
|---|---|---|---|
| 1-1.5L | 100ml | 500ml | 30 minutes |
| 1.5-2L | 125ml | 700ml | 30-40 minutes |
| 2L+ | 150ml | 850ml | 40 minutes |
Pour the diluted solution into your cold kettle, bring to the boil, then switch off immediately – the heat activates the descaling agents without risking damage to internal components.
After soaking, empty completely and rinse twice with fresh water before your next brew tastes exactly as it should.
Cleaning electric kettles safely
Special considerations for electric models
Safety comes first when descaling electric kettles – one wrong move with water and electricity can turn cleaning the kettle into a dangerous situation.
Always unplug your kettle completely before starting – not just switching it off, but removing the plug from the wall socket entirely.
Key safety rules for electric kettles:
- Keep the base dry at all times – water and electrical components don’t mix, ever
- Never submerge the kettle base – only the kettle body goes near water during cleaning
- Check for damaged cords before descaling – frayed wires pose serious risks
- Let the kettle cool completely – descaling a hot kettle can cause steam burns
Some models have built-in filters or temperature sensors that need gentler treatment than standard kettles. Always check your manual first – manufacturers know their products best, and ignoring their advice could void your warranty or damage delicate components.
Cleaning the exterior and filter
Your kettle’s outside deserves as much attention as the inside – and the filter needs regular care to keep doing its job properly.
For the exterior cleaning:
- Wipe with a damp cloth and mild washing-up liquid – removes water spots and kitchen grime effectively
- Dry immediately with a soft towel – prevents streaking and water marks
- Polish stainless steel models with a drop of olive oil – creates that showroom shine
Filter maintenance made simple:
- Remove the filter carefully – it usually clips or slides out from behind the spout
- Rinse under warm water – tackles daily debris and loose deposits
- Scrub gently with an old toothbrush – reaches into mesh corners where limescale hides
| Filter Type | Cleaning Method | Frequency |
|---|---|---|
| Mesh filter | Warm soapy water | Weekly |
| Limescale filter | Vinegar soak | Monthly |
| Carbon filter | Replace only | As per manual |
Never submerge your electric kettle base – that’s where all the electrical components live, and water damage isn’t covered by warranty.
How often should you descale your kettle?
Descaling frequency by water hardness
Water hardness determines how often you’ll be reaching for that bottle of vinegar – and knowing your local water type saves you from both under-cleaning and over-cleaning your kettle.
The harder your water, the more frequently limescale builds up inside your kettle’s heating elements and internal surfaces.
| Water Type | Hardness Level | Descaling Frequency |
|---|---|---|
| Soft water | 0-60 mg/L | Every 6-12 months |
| Moderately hard | 61-120 mg/L | Every 3-6 months |
| Hard water | 121-180 mg/L | Every 1-3 months |
| Very hard water | 181+ mg/L | Monthly or more |
Key factors affecting your schedule:
- Daily usage frequency – heavy tea drinkers need more frequent descaling
- Kettle type and filter quality – some models resist buildup better than others
Check your local water authority’s website for specific hardness levels in your area – this simple step helps you create the perfect maintenance routine.
Signs it’s time to descale again
Spotting the telltale signs saves you from brewing disappointment – and your kettle will practically tell you when descaling time rolls around again.
Watch for these warning signals:
- White flakes floating in your cuppa – those aren’t sugar crystals, that’s limescale breaking free
- Longer boiling times – if your morning brew takes ages, limescale is slowing things down
- Strange noises during heating – popping, crackling, or rumbling sounds mean buildup is back
- Cloudy water even after boiling – mineral deposits are having a party in there
- Metallic or off taste – when your tea tastes like you’re licking a spoon
The golden rule? Don’t wait until you see chunks – regular maintenance beats emergency descaling every time. If you notice any combination of these signs, it’s time to break out your chosen descaling method again.
Preventing limescale buildup
Daily habits that reduce scaling
Small changes to your daily routine make a massive difference – and most of these habits take seconds to implement but save hours of scrubbing later.
Simple daily practices that prevent buildup:
- Empty your kettle completely after each use – standing water concentrates minerals as it evaporates overnight
- Give it a quick rinse with fresh water – removes residual minerals before they can settle and harden
- Use filtered water when possible – even basic jug filters reduce calcium and magnesium levels significantly
- Only boil what you need – less water means fewer mineral deposits left behind
- Leave the lid open after use – allows moisture to escape and prevents mineral concentration
The beauty lies in consistency rather than perfection – even following two or three of these habits regularly cuts limescale formation dramatically. Your future self will thank you when descaling becomes a monthly task rather than a weekly battle.
Water filtration solutions
Installing a proper water filter transforms your kettle maintenance routine – and choosing the right system depends on your budget, space, and how serious your limescale problem really is.
Different filtration systems tackle minerals at various stages:
| Filter Type | Cost | Effectiveness | Best For |
|---|---|---|---|
| Jug filters | £15-30 | Moderate | Light scaling, renters |
| Tap attachments | £20-50 | Good | Daily use, easy install |
| Under-sink systems | £100-300 | Excellent | Heavy scaling, permanent solution |
Key benefits you’ll notice immediately:
- Better-tasting water straight from the tap
- Reduced limescale buildup in all your appliances
- Lower descaling frequency – monthly becomes quarterly
Activated carbon filters handle taste and odour, while reverse osmosis systems provide thorough mineral removal. Even basic jug filters cut limescale formation by 60-80% in most UK households.
Choose based on your water hardness level – if you’re descaling monthly, invest in a permanent solution rather than fighting the same battle repeatedly.
Choosing kettles with limescale filters
Not all limescale filters work the same way – and knowing which type suits your needs saves you from buying the wrong kettle twice.
Two main filter types tackle limescale differently:
| Filter Type | How It Works | Best For | Maintenance |
|---|---|---|---|
| Mesh spout filters | Catches flakes as you pour | Light scaling, budget-conscious | Rinse weekly |
| Built-in water filters | Treats water before boiling | Heavy scaling, taste improvement | Replace monthly |
Key features to prioritise when shopping:
- Removable filters – dishwasher-safe options save scrubbing time
- Concealed heating elements – flat bottoms give limescale fewer surfaces to grip
- Glass construction – less porous than plastic, naturally resists buildup
Budget wisely for ongoing costs – kettles with replaceable filter cartridges need £4-6 monthly investment, while mesh filters only require regular cleaning.
Pro tip: Check reviews from hard water areas specifically – they’ll tell you which models actually deliver on their anti-limescale promises rather than just marketing claims.
Troubleshooting common descaling issues
When descaling doesn’t work completely
Sometimes your best descaling efforts leave stubborn deposits behind – and that’s when you need to diagnose what went wrong rather than simply trying again.
Common reasons descaling fails and how to fix them:
- Insufficient soaking time – Your solution needs at least 30 minutes to work properly, but heavily scaled kettles may need 2-3 hours
- Wrong concentration ratio – Too weak and nothing happens; use equal parts vinegar and water, or 2 tablespoons citric acid per 500ml
- Water temperature too low – Cold solutions barely touch limescale; always bring the mixture to a rolling boil first
- Multiple thin layers – Ancient buildup needs repeat treatments; run the same descaling process 2-3 times consecutively
If limescale still clings after proper descaling, you’re likely dealing with calcium phosphate deposits rather than standard calcium carbonate – these need stronger commercial descalers or mechanical removal with a soft sponge and gentle scrubbing action.
Dealing with stubborn limescale deposits
When standard descaling methods leave thick, crusty deposits behind – you need targeted techniques that tackle the toughest buildup without damaging your kettle.
Try these intensive approaches for stubborn limescale:
- Soak vinegar-soaked kitchen paper directly on deposits – wrap problem areas and leave for 2-3 hours before scrubbing gently
- Double-strength citric acid treatment – use 4 tablespoons per 500ml water, boil twice consecutively
- Baking soda paste scrub – mix with lemon juice, apply to deposits, leave 30 minutes then scrub with soft sponge
- Commercial descaler overnight soak – follow packet instructions but extend soaking time to 8-12 hours
Never use metal scrapers or abrasive pads – they’ll scratch your kettle’s surface permanently. Patience and repeated gentle treatments always win over brute force with limescale removal.