Summarise this article with:
 Claude
Sparkling windows transform your home, letting in maximum natural light whilst boosting your property’s kerb appeal. We connect you with professional window cleaning techniques that deliver streak-free results every time. Whether you’re tackling inside panes or reaching those tricky outside windows, we’ll guide you through the process with confidence.
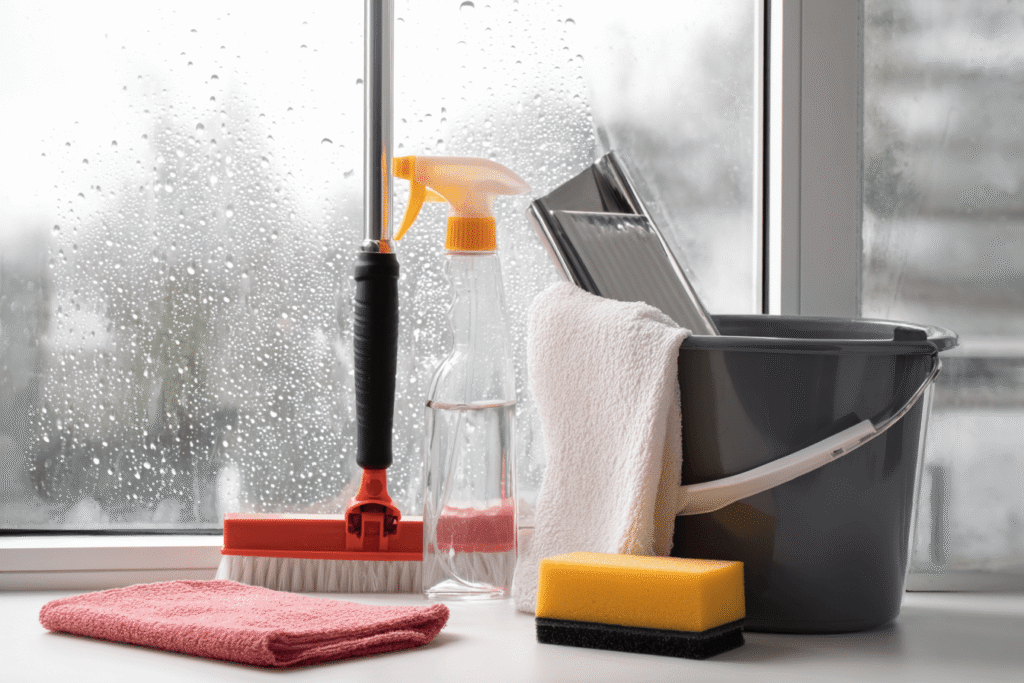
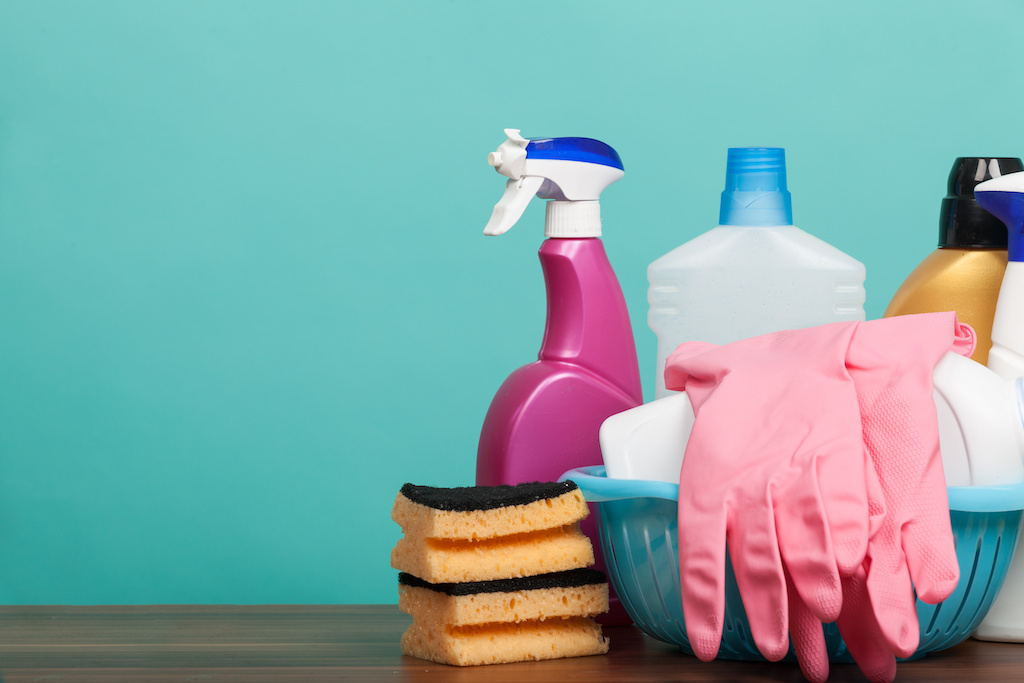
Essential Window Cleaning Equipment
Basic Tools for Professional Results
Getting the right tools makes all the difference between frustrating smears and crystal-clear glass. You don’t need expensive equipment to achieve professional standards – just the essentials done properly.
Core Equipment You Need:
- Squeegee (12-14 inch): Cleaning windows with a squeegee is your best friend for removing excess water without streaks
- Microfibre cloth: Perfect for drying and polishing window frames
- Spray bottle: Controls window cleaning solution application better than dunking
- Scraper: Removes stubborn stains and paint spots safely
Additional Tools for Efficiency:
- Extension pole: Reaches high internal windows without ladders
- Bucket: Wide enough for your squeegee and cleaning cloths
- Dry brush: Clears loose dirt before wet cleaning begins
Top Tip: Always work from top to bottom and keep your squeegee blade clean between strokes. A dirty blade creates more streaks than dirty windows! You can also read our full guide on the best window cleaning equipment.
Quality beats quantity every time – invest in decent tools and they’ll serve you for years.
Best Cleaning Solutions and Homemade Options
Cleaning windows with white vinegar remains your go-to method for streak-free windows. Mix these proven solutions for professional results:
| Solution Type | Recipe | Best For |
|---|---|---|
| Basic Vinegar Mix | 1 part vinegar + 10 parts warm water | Regular cleaning, everyday grime |
| Heavy-Duty Blend | Equal parts vinegar + water + few drops washing-up liquid | Stubborn stains, greasy marks |
| Quick Soap Solution | 2 cups water + ½ teaspoon dish soap | Light cleaning, maintenance |
Apply using your spray bottle and wipe with microfibre cloths in circular motions. For an overcast day, these solutions won’t dry too quickly, preventing those annoying streaks.
Pro Tip: Use distilled water if you live in a hard water area – tap water minerals create spots that ruin your perfect finish.
Preparing Your Windows for Cleaning
Removing Dust and Debris Safely
Start with dry cleaning before any water touches your windows. This prevents muddy streaks that make your job twice as hard.
Step-by-Step Dust Removal:
- Use a dry microfibre cloth to wipe away loose dust and cobwebs from window surfaces
- Vacuum with brush attachment for window sills and frames where debris tends to collect
- Work from top to bottom to avoid redistributing dirt onto clean areas
For stubborn spots, gently brush away particles with a soft-bristled brush. Never scrape dry debris directly – you’ll scratch the glass.
Once you’ve cleared all loose material, you’re ready for wet cleaning. This preparation step saves time and delivers that streak-free finish we’re all after.
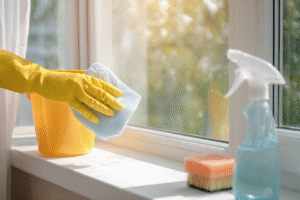
Cleaning Window Frames and Sills First
Tackle frames and sills before touching the glass – this prevents dirty water from dripping onto freshly cleaned windows. Use warm soapy water and a soft cloth to wipe down all frame surfaces, paying attention to corners where grime accumulates.
For uPVC frames, mix one part white vinegar with four parts warm water in your spray bottle. Let the solution sit for a few minutes before wiping clean. Wooden frames need gentler treatment – apply your cleaning product to the cloth rather than directly onto the wood to avoid damage.
Pro Tip
Work systematically around each window frame, then move to the sills. This prevents you from cleaning the same area twice and ensures nothing gets missed.
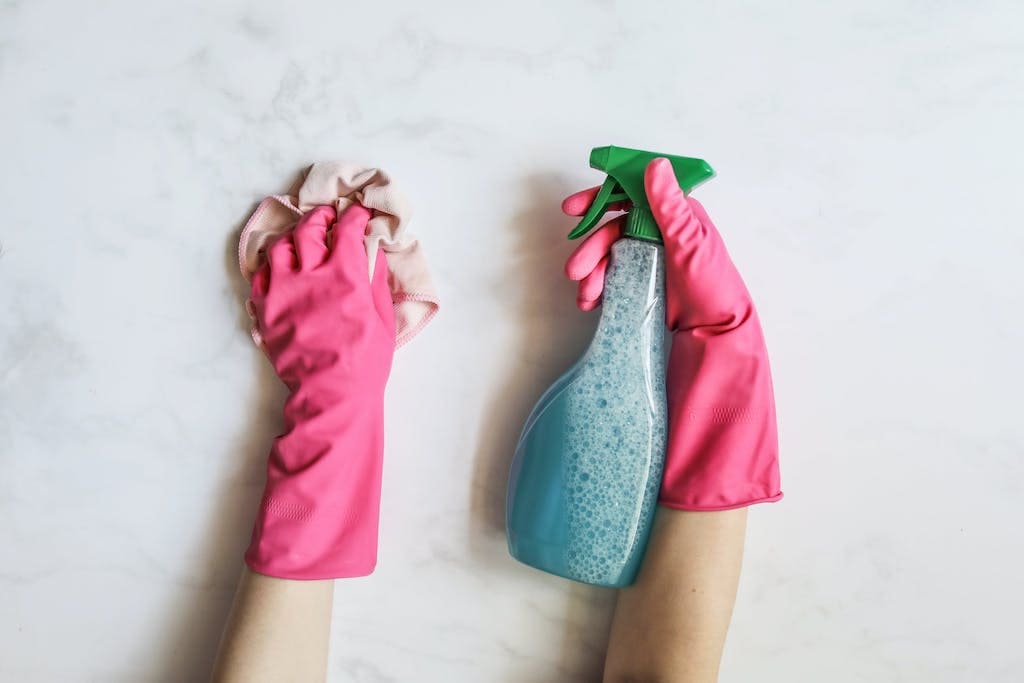
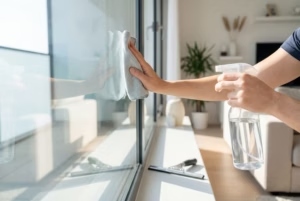
Step-by-Step Window Cleaning Technique
Washing Inside Windows Like a Professional
Apply your cleaning solution using a spray bottle rather than soaking the glass. Work in manageable sections to prevent the solution drying before you can wipe it clean.
Essential Washing Steps:
- Spray lightly across the window surface, avoiding oversaturation
- Wipe in horizontal strokes using a clean microfibre cloth from side of the window to the opposite end
- Squeegee across the window from top to bottom, cleaning the blade after each previous stroke
The key is working quickly but systematically. Indoor cleaning requires less solution than outdoor work since there’s no heat from direct sun to speed up drying.
Top Tip
Use paper towel to catch drips at the bottom edge — this old trick prevents water damage to wooden sills and keeps your glass shiny.
Best Way to Clean Outside Windows
Exterior windows face the elements, so they need a different approach than indoor cleaning. Start by hosing down each window to remove loose dirt and debris before applying any cleaning solution.
Outside Cleaning Process:
- Mix warm water with a few drops of washing-up liquid in your bucket
- Scrub from top to bottom using a sponge or soft brush attached to an extension pole
- Rinse thoroughly with clean water to remove all soap residue
- Squeegee immediately while the surface is still wet, working in overlapping strokes
For hard-to-reach upper windows, extension poles eliminate the need for ladders while delivering professional results.
Mastering the Squeegee Method
The squeegee transforms window cleaning from a frustrating chore into a satisfying skill. Position your blade at a 10-15 degree angle against the glass – too steep and water returns to cleaned areas.
Pro Tip: Wipe your blade with a microfibre cloth after each stroke to prevent transferring dirt back onto the glass.
| Technique | Best For | Key Movement |
|---|---|---|
| Straight pulls | Standard windows | Top to bottom, overlapping strokes |
| S-pattern | Large panes | Continuous curved motion |
| Fanning method | Stubborn dirt | Short strokes in different directions |
Start at the top corner and pull steadily across in your chosen pattern. The rubber blade should glide smoothly – if it skips or judders, you need fresh rubber or better solution coverage.
How Do You Clean Windows Without Streaks?
The secret to streak-free windows lies in controlling how quickly your cleaning solution dries. When water evaporates faster than you can wipe it away, mineral deposits and soap residue create those frustrating marks.
Use distilled water instead of tap water to eliminate mineral deposits that cause streaking. Mix this with white vinegar in equal parts for the most effective homemade solution.
Work in small sections and wipe immediately after applying solution. The longer cleaning products sit on glass, the higher your chances of streaking. Always finish with a completely dry microfibre cloth to remove any remaining moisture.
Pro Tip: Clean windows in a consistent direction – either all horizontal or all vertical strokes. This way, if streaks do appear, you’ll know which side of the glass they’re on, making touch-ups much easier.
Common Window Cleaning Mistakes to Avoid
Timing and Weather Considerations
Spring and autumn emerge as your window cleaning sweet spots, offering mild temperatures between 10-24°C that prevent solutions from drying too quickly or freezing on contact.
Avoid these conditions:
- Direct sunlight during midday hours (10 AM – 4 PM)
- Freezing temperatures below 0°C
- Heavy rain or strong winds that undo your efforts immediately
Best weather for cleaning:
| Condition | Why It Works | Timing |
|---|---|---|
| Overcast days | Prevents rapid evaporation | Any time of day |
| Early morning | Cooler glass, less wind | 7-9 AM |
| Late afternoon | Softer light, stable conditions | 4-6 PM |
Pro Tip: Check your weather forecast and book cleaning sessions 2-3 days ahead when mild, dry conditions are predicted.
Tool and Technique Errors
Wrong tools create more problems than they solve – and many people don’t realise they’re sabotaging their own efforts.
Avoid these common tool mistakes:
- Paper towels or newspaper leave lint and streaks behind
- Dirty squeegees spread grime rather than remove it
- Abrasive materials like steel wool scratch glass permanently
- All-purpose cleaners often contain ingredients that cause film buildup
Technique errors that ruin results:
- Scrubbing too aggressively – let your cleaning solution do the work instead
- Using too much water which damages frames and creates excess drips
- Ignoring the squeegee blade angle – maintain 45 degrees for optimal contact
Top Tip: Clean your squeegee blade after every few strokes with a lint-free cloth. A contaminated blade transfers dirt back onto clean glass, undoing your hard work instantly.
Advanced Tips for Challenging Windows
Cleaning High Windows Safely
Reaching high windows requires the right equipment and safety mindset to avoid accidents.
Essential safety equipment:
- Extension poles with squeegee attachments eliminate ladder risks entirely
- Telescoping rods extend up to 4 meters for second-floor access
- Water-fed pole systems use purified water for streak-free results
Safety rules to follow:
- Never lean out of upper-floor windows
- Use sturdy ground positioning when operating extension poles
- Check equipment stability before each use
When to call professionals:
- Windows above second-floor level
- Awkward angles or architectural features
- Lack of proper safety equipment
Dealing with Stubborn Stains and Smears
Some stains refuse to budge with standard cleaning methods – but the right approach removes even the most persistent marks.
Baking soda paste works wonders for mineral deposits and hard water stains. Mix three parts baking soda with one part water, apply to the affected area, and let it sit for 10 minutes before scrubbing gently with a microfibre cloth.
For grease and fingerprints, white vinegar mixed with a few drops of dish soap cuts through stubborn residue. Spray the solution, wait five minutes, then wipe clean using circular motions.
Razor scrapers handle paint splatters and adhesive residue when used at a 45-degree angle. Work slowly to avoid scratching the glass surface.
Top Tip
Always test cleaning solutions on a small, inconspicuous area first. Different glass types react differently to various products, and you’ll avoid potential damage to your entire window.