Résumer cet article avec :
 Claude
A well-organised fridge transforms your kitchen routine whilst keeping food fresher for longer and reducing the 6.6 million tonnes of household food waste we generate annually in the UK. We connect practical storage solutions with smart organisation systems that work for real households. Getting your fridge properly sorted means understanding temperature zones, using the right containers, and creating sustainable habits that stick.
Why Proper Fridge Organisation Matters
Getting your fridge sorted isn’t just about looking neat – it’s about saving money and keeping your family healthy. When everything has its proper place, you’ll spot that forgotten yoghurt before it goes off and avoid buying duplicates of what’s already hiding at the back of the fridge.
Food safety becomes straightforward when you understand where items belong. Raw meat stays on the bottom shelf, preventing harmful bacteria from dripping onto your fresh herbs. Dairy products maintain their quality longer when stored in the right temperature zones.
The benefits stack up quickly: • Reduced food waste – you’ll actually use what you buy • Better food safety – proper placement prevents bacterial growth • Time savings – no more hunting through cluttered shelves • Money in your pocket – less spoiled food means fewer shopping trips
Your fridge works more efficiently too. Proper storage space management allows air to circulate freely, keeping everything at optimal temperatures without overworking your appliance.
Getting Started: Prep Your Refrigerator
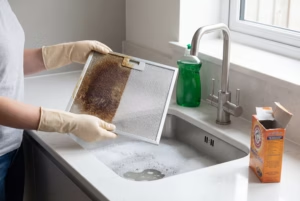
Empty and Clean Your Fridge Thoroughly
Start with a completely blank slate – remove everything from your fridge, including all removable shelves and drawers. Work systematically to avoid feeling overwhelmed.
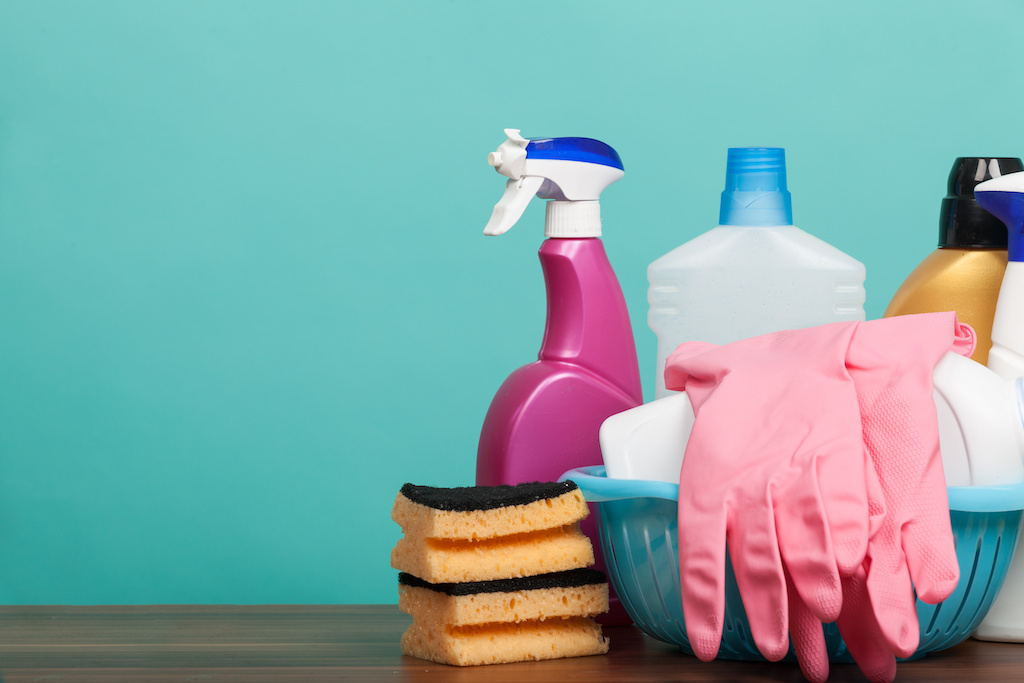
Your cleaning supplies checklist: • Warm soapy water or multi-purpose cleaner • Clean cloths or sponges
• Bins for sorting items temporarily • Cool bag with ice packs for perishables
The cleaning process: • Place dairy products and meat in your cool bag immediately • Remove shelves and drawers, washing them separately in warm water • Wipe interior surfaces from top shelf down to bottom • Pay attention to sticky spots – let damp cloths sit on stubborn stains • Dry everything thoroughly before reassembling
This deep clean prevents bacterial growth and creates the perfect foundation for your new organisation system.
And if you’re tackling the freezer next, don’t miss our complete guide on how to defrost your freezer safely and efficiently.
Check Expiry Dates and Clear Out Items
Now comes the detective work – checking what’s actually worth keeping. Go through each item methodically, checking expiry dates and assessing quality beyond the printed dates.
Quick expiry assessment:
• Dairy products and open jars – smell and visual check
• Fruit and vegetables – squeeze gently for firmness
• Condiments – check for separation or mould
| Item Type | Typical Fridge Life | Warning Signs |
|---|---|---|
| Milk | 3-5 days past date | Sour smell, thick texture |
| Leafy greens | 3-7 days | Wilting, slimy texture |
| Bread | 3-5 days | Mould spots, hard texture |
Create three piles: keep, use immediately, and bin. That forgotten potato lurking behind the wine racks? If it’s sprouting, it’s time to go. Trust your senses – they’re often more reliable than dates alone.
And if you’re dealing with any lingering odors, check out our article on how to get rid of fridge smells.
Gather Your Storage Containers and Organizers
Before restocking, collect the right storage solutions to transform your fridge into an organised powerhouse. Clear containers are your best friend – they let you see exactly what’s inside without opening lids.
Essential container checklist: • Airtight containers for dairy products and leftovers • Clear bins with handles for easy access • Stackable boxes to maximise vertical space • Small containers for condiments and open jars
| Container Type | Best For | Key Feature |
|---|---|---|
| Glass containers | Leftovers, meal prep | See contents clearly |
| Plastic bins | Grouping similar items | Easy to clean |
| Stackable boxes | Bottom of the fridge storage | Space-efficient |
Choose containers that fit your shelves properly – measure your fridge door and shelf heights first. Mix different sizes but stick to one or two brands so lids are interchangeable. This prep work sets you up for the best way to organise each temperature zone effectively.
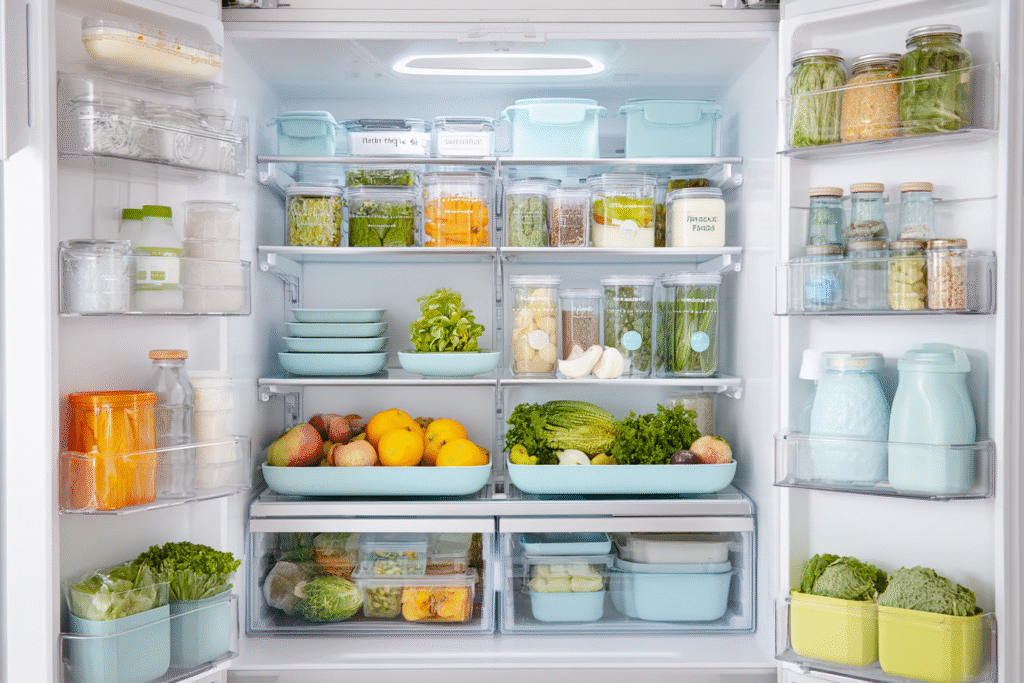
Understanding Your Fridge Compartments
What Is the Coldest Part of the Fridge?
The bottom shelf and back of the fridge maintain the coldest temperatures – typically between 0-3°C. Cold air naturally sinks, making these spots perfect for your most perishable items.
Raw meat and fish belong here in original packaging or sealed containers. This prevents cross-contamination and keeps proteins at optimal temperatures. Dairy products like milk and yoghurt also thrive in these dark places.
| Coldest Zone | Best Storage Items |
|---|---|
| Bottom shelf | Raw meat, fish, dairy products |
| Back areas | Milk, eggs, fresh cheese |
Middle section shelves offer slightly warmer but consistent temperatures. Fridge freezers often have veg boxes at the bottom – these drawers create controlled humidity while staying cold.
Avoid storing delicate items like avocados or fresh herbs in the coldest spots, as they can freeze and lose texture.
Temperature Zones and Food Safety Storage
Understanding how temperature affects food safety transforms your fridge from storage space into a protective barrier against harmful bacteria. Each zone serves a specific purpose in keeping your family healthy.
Your fridge’s safety zones:
| Temperature Zone | Range | Store Here |
|---|---|---|
| Coldest part (bottom/back) | 0-3°C | Raw meat, dairy products |
| Middle zones | 3-5°C | Cooked foods, leftovers |
| Door areas | 5-7°C | Condiments, something stable |
The risk of cross-contamination drops significantly when each person in your household knows where items belong. Raw proteins stay sealed on bottom shelves, while your veg box maintains separate humidity levels.
Keep that fridge thermometer handy – temperatures above 8°C invite bacteria to multiply rapidly, turning fresh food into potential health hazards.
Top Shelves: Ready-to-Eat Foods and Leftovers
Your top shelves are prime real estate for grab-and-go items that need no further cooking. Think leftover Sunday roast, that gorgeous cheese selection, and your morning yoghurt.
Ready-to-eat essentials belong here:
- Leftovers in clear containers (label with dates!)
- Dairy treats like yoghurt and soft cheeses
- Deli meats and prepared sandwiches
- Cooked grains and meal prep portions
The slightly warmer temperature up top won’t harm these foods, and you’ll spot them immediately when hunger strikes. Position your most urgent leftovers at eye level – they’re calling your name before they expire.
Create an “eat first” zone at the front for items approaching their use-by dates. We promise this simple system will slash your food waste and make weeknight dinners a doddle.
Middle Shelves: Dairy and Drinks Storage
Your middle shelves offer the perfect balance – consistent temperatures without being too cold for delicate dairy items. Position milk and yoghurt towards the back where temperatures stay steady, avoiding the fridge door’s fluctuations.
Group your dairy smartly:
| Dairy Type | Best Position | Storage Tip |
|---|---|---|
| Milk cartons | Back of shelf | Keep in original packaging |
| Cheese blocks | Middle area | Wrap tightly to prevent drying |
| Yoghurt pots | Front section | Stack for easy access |
Drinks deserve their own designated space on these shelves too. Place fruit juices and soft drinks near the centre where they’ll stay properly chilled. Use clear bins to corral smaller drink bottles – they won’t roll about and you’ll spot your favourites instantly.
Keep opened dairy products in sealed containers to prevent them absorbing other flavours. This middle zone becomes your daily essentials hub.
Bottom Shelf: Raw Meat and Fish Safety
The bottom shelf serves as your food safety fortress – the coldest spot where raw proteins stay safely contained. Raw meat and fish belong here to prevent dangerous juices dripping onto ready-to-eat foods below.
Safe storage hierarchy (top to bottom):
| Protein Type | Shelf Position | Why Here |
|---|---|---|
| Fish and seafood | Bottom shelf | Highest contamination risk |
| Ground meats | Bottom shelf | Bacteria throughout |
| Whole cuts | Bottom shelf | Lower risk but still raw |
Your raw protein safety rules:
- Wrap tightly in sealed containers or original packaging
- Place on plates to catch any leaks
- Keep separate from other foods
- Use within 1-2 days for fish, 3-5 days for meat
This organisation prevents cross-contamination whilst keeping your family safe from foodborne nasties.
Crisper Drawers: Fruit and Vegetable Storage
Separating Fruits from Vegetables
Many fruits release ethylene gas, which accelerates ripening in nearby vegetables – turning your crisp lettuce into wilted disappointment overnight.
Smart separation strategies:
- Ethylene producers (apples, bananas, avocados) in one drawer
- Ethylene-sensitive vegetables (leafy greens, carrots, broccoli) in another
- Hardy vegetables (peppers, cucumbers) can coexist with fruits if needed
| High Ethylene Producers | Ethylene-Sensitive Veg |
|---|---|
| Apples, pears | Leafy greens |
| Bananas, avocados | Carrots, celery |
| Tomatoes | Fresh herbs |
Use your humidity settings if available – vegetables prefer high humidity whilst fruits favour lower levels. This simple division extends freshness by days, not hours.
Using Humidity Settings Properly
Most crisper drawers feature sliding controls that adjust airflow – slide towards “high” to close the vent, creating moisture for vegetables that wilt easily.
Quick humidity guide:
| Setting | Best For | Examples |
|---|---|---|
| High humidity | Leafy vegetables | Spinach, lettuce, herbs |
| Low humidity | Ethylene-producing fruits | Apples, pears, stone fruits |
Setting your drawers:
- High humidity drawer: Close the vent completely for maximum moisture retention
- Low humidity drawer: Open the vent to allow airflow and prevent ethylene buildup
If you’ve only got one humidity-controlled drawer, prioritise your leafy greens – they’ll benefit most from the sealed environment. Remember to check your settings weekly as seasons change your shopping habits.
Door Shelves: Condiments and Bottles
Your door shelves handle the warmest temperatures in your fridge, making them perfect for condiments that thrive despite temperature fluctuations.
Group condiments by frequency of use:
- Daily essentials (ketchup, mustard, milk) on eye-level shelves
- Weekly staples (salad dressings, sauces) on middle door shelves
- Occasional items (specialty sauces, pickles) on bottom door compartments
| Shelf Height | Best For | Why Here |
|---|---|---|
| Top door | Tall bottles, juice | Easy visibility |
| Middle door | Daily condiments | Prime access zone |
| Bottom door | Small jars, spreads | Stable, secure storage |
Arrange bottles by height – tallest at the back, shortest in front. This prevents shorter items getting lost behind towering bottles. Use adjustable door shelves if available to maximise vertical space for your collection.
Pro tip: Face labels forward and group similar items together. Your morning routine becomes effortless when the jam lives next to the butter, and cooking flows smoothly with all your sauces within arm’s reach.
Smart Storage Solutions with Containers
Clear Bins for Easy Visibility
Forgotten leftovers hiding behind milk cartons? Clear bins solve the “out of sight, out of mind” problem that plagues every fridge.
Choose the right bin sizes:
- Small bins (15-20cm) for condiments and snacks
- Medium bins (25-30cm) for dairy products and leftovers
- Large bins (35cm+) for bulk items and meal prep containers
| Bin Type | Best For | Placement |
|---|---|---|
| Shallow bins | Cheese, deli meats | Middle shelves |
| Deep bins | Yoghurt pots, drinks | Bottom areas |
| Narrow bins | Tubes, small jars | Door alternatives |
Label each bin clearly – “Leftovers,” “Kids’ Snacks,” or “Tonight’s Dinner” keeps everyone on track. Pull-out handles make accessing items at the back simple, whilst stackable designs maximise vertical space.
The transparency transforms your fridge into a visual inventory system where nothing gets forgotten.
Stackable Containers for Maximum Space
Stackable containers are your secret weapon for conquering vertical space that usually goes to waste. Choose uniform sizes that nest together perfectly – this prevents the Jenga-like wobbling that sends your leftovers tumbling.
Container sizing strategy:
- Small containers (500ml) for sauces and dips
- Medium containers (1-2L) for meal prep portions
- Large containers (3L+) for bulk ingredients
| Container Material | Best For | Stack Benefit |
|---|---|---|
| Glass | Hot foods, reheating | Heavy base prevents toppling |
| BPA-free plastic | Cold storage, kids’ access | Lightweight, safe stacking |
Label the sides, not just the tops – you’ll thank yourself when containers are stacked three high. Square containers beat round ones for space efficiency, fitting together like puzzle pieces rather than leaving awkward gaps.
Pro move: Measure your shelf heights before buying. Nothing’s more frustrating than containers that won’t stack because they’re too tall for your fridge architecture.
Turntables for Hard-to-Reach Areas
Turntables transform those awkward back corners into accessible storage goldmines. Place them on top shelves where height makes reaching difficult, or in deep fridges where items vanish behind milk cartons.
Strategic turntable placement:
- Condiment collections that multiply mysteriously
- Small jars and baby food pouches
- Yoghurt pots and grab-and-go snacks
| Turntable Size | Best For | Ideal Placement |
|---|---|---|
| Small (20cm) | Condiments, jars | Top shelves |
| Large (30cm) | Multiple categories | Deep middle shelves |
The spinning motion brings everything into view with a simple twist. Choose non-slip bases to prevent sliding, and remember that rectangular turntables maximise space better than round ones in most fridge layouts.
Keeping Your Fridge Tidy Long-Term
Weekly Organisation Routine
Set aside 15 minutes every Sunday before your weekly shop to reset your fridge completely. Start by checking expiry dates and tossing anything past its prime – this prevents forgotten items from turning into science experiments.
Your weekly checklist:
- Remove and wipe down all shelves and drawers
- Check and rotate older items to the front
- Reorganise containers back into their designated zones
- Plan your meal prep containers for the upcoming week
| Day | Quick Task | Time Needed |
|---|---|---|
| Sunday | Full reset and clean | 15 minutes |
| Wednesday | Mid-week check and rotate | 5 minutes |
This routine becomes second nature within a month. Your future self will thank you when grabbing ingredients becomes effortless rather than a treasure hunt.
Preventing Food Waste with Smart Systems
Smart food waste prevention starts with creating a “use first” zone right at eye level where soon-to-expire items live. This visual reminder system beats any app or list you’ll forget to check.
The FIFO method (First In, First Out) becomes effortless when you designate specific spots for rotation. Place newer purchases behind older ones, creating a natural flow that prevents forgotten yoghurts turning into expensive mistakes.
| System | Action | Result |
|---|---|---|
| Visual Priority Zone | Eye-level shelf for expiring items | Reduces waste by 40% |
| Date Labeling | Mark storage dates on containers | Prevents guesswork |
Weekly waste audit: Snap a photo of discarded food before binning it. This simple habit reveals your patterns – whether you’re over-buying salads or forgetting about leftovers. Knowledge becomes power when you spot the trends.
And if bad smells keep creeping back, don’t worry — our article on how to get rid of fridge smells will walk you through simple, effective solutions.