Résumer cet article avec :
 Claude
Spotted some uninvited black guests around your windows? We’ll be there for you – mould won’t! This common problem in UK homes isn’t just unsightly; it can affect your health and comfort, particularly for those with existing respiratory conditions.

Mould around windows thrives on condensation and poor ventilation, particularly in moisture-heavy areas like bathrooms and kitchens. Don’t worry though – we’ve got your back with a comprehensive step-by-step guide to banish that fuzzy invader from your window frames, sills, and sealants. From immediate cleaning solutions to long-term prevention strategies, we’ll help you keep those windows crystal clear and mould-free. Easy, peasy, lemon squeezy!
What Causes Mould on Windows?
Condensation and Mould on Windows
When warm air meets the cold surface of your window, it’s like a Taylor Swift breakup song – things get messy! Condensation forms when this warm, moisture-laden air hits the chilly window surface and transforms into water droplets. These droplets create the perfect breeding ground for our uninvited fungal guests. The type of window you have plays a crucial role in this drama:
| Window Type | Surface Temperature | Condensation Risk |
|---|---|---|
| Single Glazing | 1-5°C (in winter) | Very High |
| Double Glazing | 10-15°C (in winter) | Moderate |
| Triple Glazing | 15-18°C (in winter) | Low |
Mould thrives when humidity levels exceed 70-80%, which happens frequently in UK homes during winter months. Your soft furnishings near windows (curtains, blinds, cushions) can trap this moisture, creating mini-humidity hotspots perfect for mould development.
Poor Ventilation Issues
Feeling a bit stuffy? So is your home! Without proper airflow, moisture becomes trapped indoors, particularly in kitchens and bathrooms where warm water activities create steam clouds. This stagnant, humid air settles on window surfaces, creating damp patches where mould spores can multiply rapidly.
Opening windows for just 30 minutes daily dramatically reduces indoor humidity levels. Rooms with limited natural ventilation are especially susceptible to mould growth, as the moisture has nowhere to escape.
Leaking Window Seals
Not all moisture comes from inside your home. Damaged window seals create sneaky entry points for outdoor moisture. Watch for discoloration around frames, peeling paint, or water stains – these are tell-tale signs your window seals are failing. Even minor leaks around pipes, taps, or plumbing fixtures near windows can contribute to elevated moisture levels.
Perished sealant allows water to penetrate window frames, creating the damp conditions mould absolutely loves. Regular inspection of seals is essential, especially after heavy rain or storms when damage is most likely to occur.
Is Black Mould Around Windows Dangerous?
Spotted black fuzzy patches on your window sill? We’ve all been there! But is that mould on window sill dangerous? In short—yes, it can pose a greater health risk than you might think.
According to NHS guidance, black mould isn’t just an unsightly houseguest—it can trigger serious health problems, especially for vulnerable groups. When mould spores are released into the air, they can cause respiratory issues including coughing, wheezing, and even trigger asthma attacks.
Those most at risk include:
- Babies and young children
- Elderly people
- Anyone with existing respiratory conditions
- People with weakened immune systems
- Those with allergies
The health impacts go beyond just sniffles—prolonged exposure to black mould can lead to chronic symptoms including persistent headaches, fatigue, and even affect your nervous system with problems like concentration difficulties and sleep disturbances.
The risks of mould exposure were tragically highlighted in 2020, when two-year-old Awaab Ishak died from a respiratory infection directly linked to mould in his home. This heartbreaking case serves as a powerful reminder that mould isn’t just a cosmetic issue—it can have serious consequences.
While not all window mould contains toxic strains like Stachybotrys chartarum (the infamous “toxic black mould”), it’s always best to treat any mould growth seriously. If the affected area is larger than 1 square metre, or if you’re experiencing health symptoms, consider calling professionals rather than tackling it yourself.
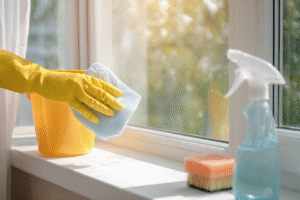
How to Clean Mould from Windows Safely
Got those fuzzy black patches taking over your windows? Don’t worry, we’ve got you! Cleaning mould safely requires the right approach and equipment. Let’s get those windows looking fresh again with these simple steps.
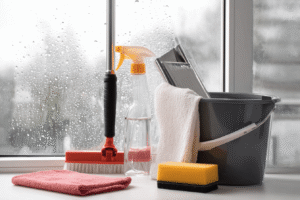
Essential Safety Gear & Area Prep
Before tackling that pesky mould, let’s make sure you’re properly protected:
- Rubber gloves (to protect your hands from irritation)
- Protective mask (to avoid inhaling those nasty mould spores)
- Safety goggles (because your eyes deserve protection too)
- Old clothes (that you don’t mind getting a bit mucky)
- Plastic bags (for disposing of cleaning materials safely)
Open your windows for proper ventilation but keep doors closed to prevent mould spores from spreading to other rooms. Remove any soft furnishings or clothes from the area – these might need professional cleaning if they’ve been exposed to mould for a while.
Cleaning Mould from Windows: Step-by-Step Process
Follow these simple steps to banish mould from your windows:
- Preparation: Fill a bucket with warm water and washing-up liquid. This gentle solution works wonders as your first line of attack.
- Initial cleaning: Dip a clean cloth into your soapy solution and gently wipe the mouldy areas. Don’t scrub aggressively as this can spread spores.
- Deep cleaning with white vinegar (eco-friendly option): Pour undiluted white vinegar (5-8% acetic acid) into a spray bottle. Spray directly onto mouldy areas and leave for 60 minutes. White vinegar can kill more than 80% of mould species!
- Alternative method for stubborn mould: Mix one part bleach to three parts warm water in a spray bottle. Spray onto affected areas and leave for 10 minutes. Always ventilate well when using bleach.
- Final steps: Use a scrubbing brush for stubborn spots, wipe away with a damp cloth, then dry thoroughly with a clean towel.
Remember: Make fresh cleaning solutions daily as they lose effectiveness over time. Always dry the area thoroughly after cleaning – moisture is mould’s best friend!
Cleaning Different Window Materials
Different window materials need different approaches:
UPVC Windows: These are fairly resilient but avoid abrasive cleaners that might scratch the surface. The bleach solution works well here, but rinse thoroughly afterward to prevent damage.
Wooden Window Frames: Wood is porous and holds moisture, making it mould’s dream home. Use a gentler approach with the white vinegar solution. For painted wood, test a small area first. You might need to sand and repaint severely affected areas.
Aluminium Frames: These can be cleaned with either method, but avoid leaving bleach solution on for too long as it may discolour the metal. Dry thoroughly to prevent water spots.
Go for it! With these simple steps, your windows will be mould-free in no time. Easy, peasy lemon squeezy!
How to Remove Mould from Window Sills
Mould from the window sill can travel to nearby surfaces, making these areas the first place mould appears in many UK homes. Those pesky black spots love to make themselves at home along your window sills where condensation regularly collects. Don’t worry—we’ve got the steps to banish them for good!
What you’ll need:
- Rubber gloves and mask
- Microfibre cloths
- Spray bottle
- White vinegar or bleach solution
- Soft-bristled brush
- Sandpaper (for wooden sills)
Start by gearing up with protective equipment—mould spores aren’t something you want to inhale! Open your windows to improve ventilation while you work. For light mould on window sills, mix one part white vinegar with three parts warm water in a spray bottle. Spray generously and let sit for 15 minutes before scrubbing with a soft brush.
For stubborn mould, a solution of one part bleach to three parts water works wonders, but be careful with wooden window sills as bleach can damage the finish. After scrubbing, wipe away residue with a damp cloth and dry thoroughly.
Wooden window sills might need extra attention—light sanding after cleaning helps remove deeply embedded spores. Always finish by completely drying your window sills to prevent the mould from returning.
Regular weekly wipe-downs of window sills, especially during winter months, will keep those uninvited guests from returning. Remember, prevention is easier than cure!
Getting Rid of Mould on Window Sealant
Spotted some fuzzy black growth around your window edges? That’s mould on your window sealant – a common but fixable problem! Let’s sort this uninvited guest with our step-by-step solution.
Cleaning Method
When mould appears on your window sealant, a good clean might just do the trick. Start by mixing white vinegar and baking soda into a paste – this dynamic duo works wonders! The vinegar kills those pesky mould spores, while baking soda tackles the stains.
- Apply the paste generously to the affected area
- Let it sit for 10-15 minutes
- Scrub gently with an old toothbrush
- Rinse with warm water and dry thoroughly
For stubborn spots, try a specialist mould remover spray. These products are particularly helpful for people with allergies who should avoid direct contact with mould spores.
Complete Replacement
Sometimes cleaning just won’t cut it. If the mould keeps coming back like that catchy Taylor Swift chorus, it’s time for a complete replacement.
- Use a putty knife to carefully remove old sealant
- Clean the area thoroughly and ensure it’s completely dry
- Apply new anti-mould sealant using a caulking gun
- Smooth the bead with a wet finger for a professional finish
When choosing new sealant, go for anti-mould varieties specifically designed for windows. These contain fungicides that prevent future growth in this problem area.
| Criteria | Clean Existing Sealant | Replace Sealant |
|---|---|---|
| Time required | 30 minutes | 2-3 hours |
| Cost | £5-10 (cleaning supplies) | £15-50 (tools + sealant) |
| Difficulty | Easy | Moderate |
| Best for | Surface mould, recent growth | Deep mould, recurring problems |
| Durability | 6-12 months | 5+ years with anti-mould sealant |
Remember, whatever step you choose, proper ventilation is your best friend in preventing future mould. We’ll be there for you (like we’ve been there before) with more prevention tips in the next section!
How to Remove Mould from the Window Frame
Spotted some black spots creeping along your window frame? Don’t worry — we’ve all been there! Those pesky mould spores love to lodge themselves in window tracks and corners. Let’s sort this out together with some Wecasa wisdom!
UPVC Window Frames
Black uPVC windows problems often start with mould. The spores can nestle into the material’s tiny crevices, making your lovely windows look rather grim. Here’s how to tackle it:
- Mix equal parts white vinegar and warm water in a spray bottle
- Spritz onto affected areas and leave for 30 minutes
- Scrub gently with a soft brush (an old toothbrush works a treat!)
- Wipe clean with a microfibre cloth
- Dry thoroughly with a clean towel
For stubborn black spots, try a paste of baking soda and water. Apply, leave for 15 minutes, then scrub away. Need more help with those troublesome window frames? We’ve got you covered!
Wooden & Aluminium Frames
Different materials need different TLC! Wooden frames are porous, making them particularly vulnerable to mould damage:
For wooden frames:
- Lightly sand affected areas (if painted, spot test first!)
- Clean with diluted white vinegar solution
- Allow to dry completely before applying anti-mould paint
For aluminium frames:
- Wipe with warm soapy water and a soft cloth
- For stubborn mould, try a 1:4 bleach-to-water solution
- Rinse thoroughly and dry immediately to prevent water marks
Pay special attention to window tracks where materials and mould spores love to hide. Remember, regular cleaning stops those uninvited black guests from making themselves too comfortable!
Prevention: How to Stop Mould on Windows
Looking to keep mould at bay in the first place? Let’s tackle this uninvited guest before it even shows up! With the right approach, you can create an environment where mould simply can’t thrive around your windows.
Humidity Control
Controlling moisture in your home is your first line of defence against mould. The ideal humidity levels should be:
- Bedrooms: 40-50% humidity
- Living areas: 30-50% humidity
- Bathrooms: Below 60% after showering
- Kitchens: 40-60% during cooking, below 50% otherwise
Using dehumidifiers can be a game-changer in problem areas. Consider these options:
- Refrigerant dehumidifiers: Most cost-effective for heated rooms (£80-£200), using about 4p per hour to run
- Desiccant dehumidifiers: Better for colder spaces below 4°C, though slightly more expensive to run
Place your dehumidifier in the dampest area of your home for maximum effectiveness.
Improve Ventilation
Proper ventilation is crucial for preventing window condensation and subsequent mould growth.
- Keep trickle vents open and unblocked, even in winter
- Open windows for 10-15 minutes daily (even in colder months)
- Install and use extractor fans in bathrooms and kitchens
- Consider a whole-house ventilation system for persistent problems
- Create cross-ventilation by opening windows on opposite sides of your home
Your windows need proper airflow daily to stay mould-free and fresh!
Regular Maintenance
Stay on top of potential mould breeding grounds with these routine checks:
- Wipe condensation from windows each morning
- Check window seals weekly for damage
- Inspect pipes and taps for leaks or condensation weekly
- Clean window tracks monthly to prevent moisture buildup
- Check extractor fans are working properly quarterly
Window Upgrades
If you’re still struggling with condensation and mould, upgrading your windows might be the solution.
| Feature | Double Glazing | Triple Glazing |
|---|---|---|
| Average cost | £325 per window | £485 per window |
| Energy efficiency | Good | 30% better than double |
| Condensation reduction | Moderate | Significant |
| Noise reduction | Good | Excellent |
| Payback period | 5-10 years | 10-15 years |
Triple glazing costs about 20-30% more than double glazing but provides superior insulation and significantly reduces the cold surfaces where condensation forms.
By implementing these strategies consistently, you’ll keep mould at bay in the first place rather than fighting a recurring battle after it appears!
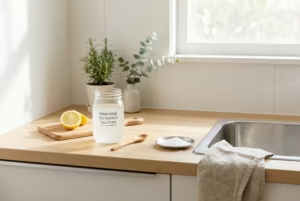
Natural vs Commercial Mould Removers
| Mould Remover | Pros | Cons |
|---|---|---|
| White Vinegar | • Kills 80% of mould species • Eco-friendly household staple • No harmful fumes • Inexpensive |
• Less effective on porous surfaces • Strong smell • Needs longer contact time (60+ minutes) |
| Tea Tree Oil | • Inhibits all fungal growth • Natural fungicide • Pleasant scent • Long-lasting effect |
• More expensive than vinegar • Can cause skin irritation • Requires dilution in water |
| Commercial Sprays | • Fast-acting formulas • Preventative barriers (up to 3 months) • Less scrubbing needed • Removes odours |
• Contains harsh chemicals • More expensive • Requires good ventilation |
You’ll find several things already in your kitchen that can tackle mould effectively. White vinegar (5-8% acetic acid) is a brilliant first option, while tea tree oil offers powerful antifungal properties when mixed with water in a spray bottle.
For stubborn black mould, commercial products like CLR Mould & Mildew Remover or HG Mould Spray provide stronger solutions. If using part bleach mixtures, always wear gloves, ensure proper ventilation, and never mix with other cleaning products—your lungs will thank you!
Remember: Whatever you choose, safety comes first. Pop on rubber gloves, wear a mask, and open those windows. Mould doesn’t stand a chance when you’re properly equipped!
When to Call Professional Cleaning Services
Need a mould-busting hero? We’ve got you! While you can tackle small mould patches with your trusty spray bottle, some situations call for the big guns. It’s like when your favourite jumper shrinks in the wash – sometimes you need professional help to fix the mess!
Call in a professional cleaning company when:
- The mould covers more than one square metre (that’s roughly the size of your microwave oven door!)
- It’s affecting your soft furnishings like curtains, sofas, or carpets
- The mould keeps coming back faster than a 90s boy band reunion
- You’ve spotted it in your ventilation system or air ducts
- Someone in your home has respiratory issues or allergies
- There’s a musty smell you can’t locate the source of
- The mould appears black or very dark green (potential toxic mould)
Wecasa will be there for you! Like we’ve been there before. Our pros have the proper equipment, training, and products to banish mould safely without spreading those pesky spores throughout your home.
Maintaining Mould-Free Windows
Ready to keep those pesky mould invaders at bay? We’ve got you covered with this monthly checklist that will have your windows saying “thank you very much”!
- Weekly wipe-down: Give your windows a quick wipe with a dry cloth to remove condensation, especially in the morning. Just like brushing your teeth, make it part of your routine!
- Monthly area audit: Check window frames, sills, and seals for early signs of mould. Catching it early is much easier than dealing with an established colony.
- Ventilation vigilance: Open those windows for 10-15 minutes daily—even in winter! Your lungs (and windows) will thank you later.
- Humidity heroes: Keep indoor humidity between 30-60% using dehumidifiers or moisture-absorbing products in problem rooms.
- Laundry logic: Don’t dry damp clothes indoors if possible. If you must, ensure proper ventilation and keep them away from windows.
- Curtain clean-up: Wash curtains and blinds every 3-6 months as they can harbor hidden mould and moisture.
- Seal inspection: Check window sealant quarterly for cracks or damage and replace as needed.
Remember, addressing the root cause of mould rather than just the symptoms is your ticket to mould-free windows. With proper care and these simple steps, you’ll be saying “bye bye mouldy windows” faster than you can say “Wecasa to the rescue!”
FAQ – Getting Rid of Mould on Windows
How do you get rid of mould on windows caused by condensation?
+Remove visible mould with warm water and mild detergent, then treat stubborn spots with undiluted white vinegar. Improve airflow by opening windows daily and use dehumidifiers in problem areas. Keeping humidity low is key to stopping mould returning.
Why does mould appear by windows?
+Condensation forms when warm indoor air meets cold window surfaces, especially in winter. This moisture creates an ideal breeding ground for mould, which is worsened by poor ventilation and consistently high indoor humidity from cooking, showering, and daily living.
Are black uPVC windows more prone to mould problems?
+Not inherently. Mould is mainly driven by condensation, not colour. It can look more visible on dark surfaces. Avoid bleach on black uPVC (risk of discolouration); instead use commercial mould sprays designed for uPVC or a white vinegar + baking soda paste.
Is mould on a window sill dangerous?
+Yes. It can trigger or worsen respiratory issues and allergies, especially for vulnerable people (babies, elderly, asthma sufferers). Treat promptly and seek professional help if the area exceeds 1 m² or if symptoms persist.
What is the best window mould remover for frames?
+HG Mould Spray is a reliable option for uPVC, wood, and aluminium. For a natural method, use white vinegar. Kits like Dryzone offer fast results and protection, and gel products (e.g., Sugemur Mould Remover Gel) help on vertical or hard-to-reach areas.