Summarise this article with:
 ChatGPT
 Mistral
 Claude
 Perplexity
 Grok
Grok
If your morning brew has started tasting a little flat, bitter or just off, your machine is probably overdue a clean. Learning how to clean a Ninja coffee maker properly is the single best thing you can do to protect the flavour of the coffee and keep the machine running for years. The good news? A Ninja coffee maker is designed to be looked after at home with a few simple habits and, occasionally, a proper deep clean.
In this guide we walk you through every step — from rinsing the brew basket after each use to running a full cleaning cycle, descaling stubborn mineral buildup and getting that stubborn CLEAN light to switch off. Whether you own a drip model, a DualBrew, a Ninja Specialty Coffee Maker or the newer Luxe Café, you’ll find the right method below.
Why cleaning your Ninja coffee maker matters
Coffee is oily, and water is rarely as pure as it looks. Without regular cleaning, coffee oils, mineral deposits and other residues build up inside the machine, negatively impacting both flavour and function. Some coffee makers just naturally build up more stains than others, and the Ninja — with its high brew temperatures and multiple brew modes — is a workhorse that earns its keep.
There are really two jobs to think about. The first is everyday hygiene: washing the removable components so old coffee oils don’t turn rancid. The second is descaling, which tackles the limescale that hard UK water leaves behind. Descaling dissolves these mineral deposits and cleans out your coffee machine’s internal parts, restoring proper water flow and temperature. Cleaning and maintaining every component of your Ninja coffee maker, as the manufacturer suggests, is a great way to ensure the machine lasts for years.
When should you clean your Ninja coffee maker?
A good rule of thumb for most Ninja coffee makers looks like this:
- After every brew: rinse the brew basket, carafe and frother whisk.
- Weekly: hand-wash or dishwasher-clean the removable parts and wipe the machine down.
- Every 1–3 months: run a full descaling cycle (more often if you live in a hard-water area).
Most Ninja models take the guesswork away with a descaling reminder. When the indicator comes on, run a cleaning cycle on the mode (Grounds, Pods, Hot Water) you use most. Don’t skip daily and weekly cleaning steps and descaling reminders — they exist to protect the machine long before problems appear.
Daily and weekly cleaning: the removable parts
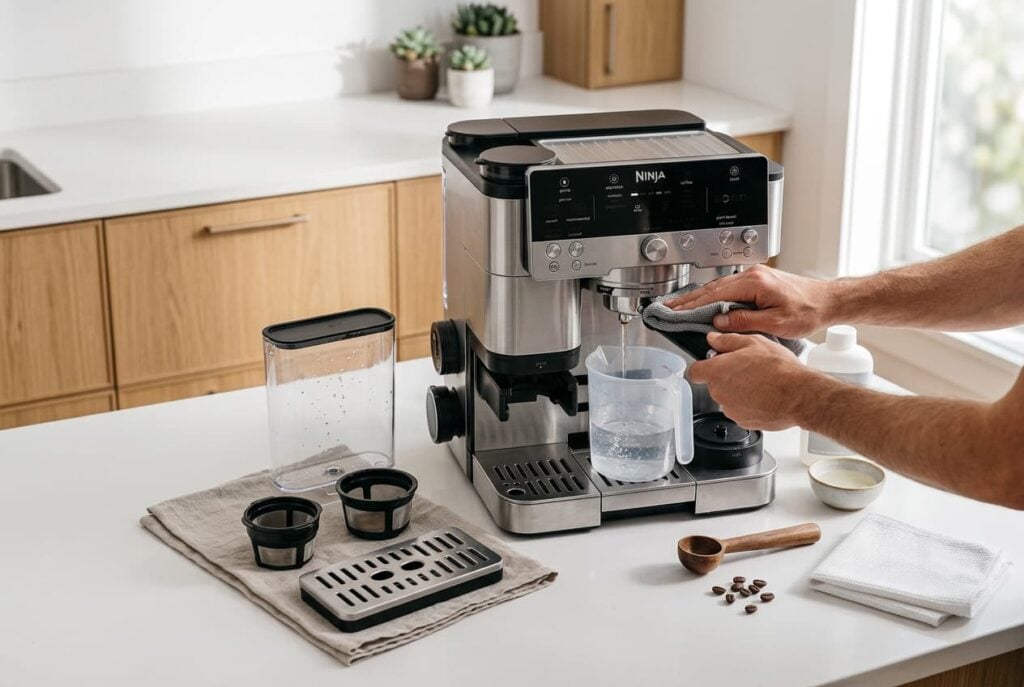
Everyday cleaning is quick and makes the bigger jobs far easier. The following steps outline the best practices for cleaning these components after use. Always let the machine cool first.
Remove the glass carafe and filter basket from the Ninja coffee maker, then work through each removable part. Typically, the carafe and filter basket are dishwasher safe, but placing them on the top rack is advisable to avoid high-heat damage. On many models the glass carafe, lid, permanent filter, removable filter holder, water reservoir flip-top lid, frother whisk and scoop are all dishwasher top-rack safe.
| Component | How to clean | Dishwasher safe? |
|---|---|---|
| Brew basket / filter | Rinse coffee grounds, wash in warm soapy water | Yes (top rack) |
| Glass carafe | Warm soapy water or dishwasher | Yes (top rack) |
| Frother whisk | Hand-wash after each use | Yes (top rack) |
| Drip tray | Empty, rinse, dry | Usually yes |
| Water reservoir | Rinse; occasional deep clean | Model dependent |
| Pod adapter | Hand-wash only | No |
A few components need special attention. Ninja’s experts suggest cleaning the frother whisk after each use, either by hand-washing or placing it on the top rack of the dishwasher. The pod adapter is not dishwasher safe, so always hand-wash it in warm, soapy water. Depending on the model, there may be additional removable parts, such as the drip tray, frother or lid — check your manual so nothing gets missed. Ensuring that these components are dry helps prevent mould and mildew growth in your Ninja coffee bar; if you ever spot dark spots that won’t shift, our guide on how to get rid of black mould covers safe removal.
How to run a clean cycle on a Ninja coffee maker
Running a cleaning cycle is the heart of Ninja coffee machine cleaning, and it’s mostly hands-off. Here’s the general routine that applies to most drip and Specialty models:
- Fill the water tank with your cleaning solution up to the descale or max fill line — this ensures the solution can circulate through the entire system.
- Place the empty carafe under the brew basket to catch the liquid.
- Press the Clean button (the CLEAN light or indicator will illuminate).
- Let the solution pass through the machine, cleaning the internal components.
- When the cycle finishes, the unit beeps, the clock shows END, and the CLEAN light turns off.
- Run one or two cycles of fresh, filtered water to rinse.
If cleaning in the Grounds mode, run a Full Carafe Classic brew cycle to flush everything through. On models with a control panel, special care should be taken when wiping it — use a barely-damp cloth so no liquid seeps behind the buttons.
Ninja coffee machine cleaning tablets vs descaling solution
You have a few options for what actually goes in the water tank. Ninja coffee machine cleaning tablets are the most convenient: one tablet dissolves and does the work for you. For espresso-style models, one Ninja cleaning tablet or around 5 g of espresso machine cleaner such as Puly Caff or Urnex Cafiza goes in the backflush disk. The official Ninja Descale Solution sachet is the other manufacturer-approved route — mix one sachet into cold water and pour it into the empty water tank.
Can you use vinegar to clean your Ninja coffee maker?
Yes — unlike some espresso brands, Ninja machines can be cleaned with white vinegar, and it’s the budget-friendly favourite. A cheaper solution is simply running the cycle with white vinegar instead of water (ordinary distilled white vinegar, not thick “cleaning vinegar”), then running filtered water through a few times afterwards. If you’re unsure which bottle to buy, our explainer on whether distilled vinegar is the same as white vinegar clears it up.
The one downside: white vinegar can leave a strong odour, so it’s important to run a cleaning cycle or two with plain water to remove any residual smell before your next coffee. A gentler alternative for the reservoir is to mix a few tablespoons of baking soda with water to create a solution and pour it into the water reservoir — you can read more clever uses in our baking soda cleaning guide. A word of caution on the Luxe Café: some owners advise descaling through the water tank and cleaning through the portafilter only, avoiding vinegar in the espresso path because it can degrade the internal rubber O-rings and the taste lingers.
How to turn off the CLEAN light
The CLEAN light is simply a descaling reminder — it should switch off automatically once a full cleaning cycle has completed and the machine has rinsed through. If the light remains on after a proper cycle, try the good old “turn it off and on again” trick by unplugging the machine for a minute. Nine times out of ten the indicator resets and you’re good to go.
How to deep clean your Ninja coffee maker
A deep clean combines everything above into one thorough session — ideal every few months or whenever the coffee starts tasting stale. To deep clean your Ninja coffee maker:
- Remove and wash every removable component (brew basket, carafe, drip tray, frother, pod adapter, reservoir).
- Run a full descaling cycle with cleaning solution or white vinegar.
- Follow up with a cleaning cycle or two of fresh water to flush residue.
- Wipe the exterior, control panel and top of the brewer with a soft cloth.
To reach the internals up top, open the hinged hood on the top of the brewer by pulling up on the left side. This exposes the shower head area where coffee oils collect. It opens up the flavour of the coffee and takes away some unwanted bitterness once cleaned. Finish by drying parts with a dry cloth so no moisture is trapped.
How to descale a Ninja coffee machine
Descaling specifically targets limescale — the chalky mineral buildup hard water leaves inside the boiler and pipes. The water reservoir should be cleaned regularly to prevent mineral buildup and contamination, but descaling reaches deeper.
Fill the reservoir to the max fill line with descaling solution (or a white-vinegar-and-water mix), run the descale/clean cycle so it circulates through the entire system, then rinse thoroughly. If your household battles heavy limescale on everything from the coffee machine to the kettle, the same principles in our kettle descaling guide apply, and citric acid is another effective, food-safe descaler for the reservoir.
| Solution | Best for | Notes |
|---|---|---|
| Ninja Descale Solution | All models | Manufacturer-approved, no aftertaste |
| Cleaning tablets | Espresso / Luxe backflush | One tablet per cycle |
| White vinegar (diluted) | Drip & DualBrew | Cheap; rinse well to remove odour |
| Citric acid | Reservoir descaling | Food-safe, mild |
How to clean and descale the Ninja Luxe Café
The Ninja Luxe Café is a semi-automatic espresso machine, so it has two separate jobs: descaling through the water tank and cleaning (backflushing) through the portafilter. According to the Luxe manuals, you have two official descaling options:
- Option A — Ninja Descale Solution sachet: add one sachet to 1.1 L of cold water in a separate container, mix, then pour into the empty water tank.
- Option B — White vinegar: pour 500 ml into the water tank and top up to the descale line with cold water.
For the cleaning cycle, place one Ninja cleaning tablet (or ~5 g of a cleaner such as Puly Caff or Urnex Cafiza) in the backflush disk and run the cycle so it flushes the group head. Run a descaling cycle and follow up with a cleaning cycle or two. When cleaning the hopper, dry-clean it where possible; if you can’t shift the embedded coffee oils, use a wet cloth and then dry with a dry cloth rather than soaking the hopper. This routine covers the two models people ask about most — the 601 and 701 — as the process is identical for both.
How to clean a Ninja coffee maker with pods or DualBrew
The DualBrew and DualBrew Pro models brew both grounds and pods, so cleaning is very similar to the standard routine with a couple of extras. While the cleaning routine for the DualBrew Pro System is very similar to the above, there are some additional steps you should follow.
If using pods, remove the Ninja Pod Adapter and brew basket, then thoroughly wash the used parts with soap and warm water. Clean the frother whisk after each use by hand-washing it or placing it on the top rack of the dishwasher, and wash the carafe and brew-through lid with soap and warm water. Because the DualBrew has more removable pieces, it’s the model where drying every component really pays off — trapped moisture around the pod adapter is a common cause of odours. For more everyday shortcuts, our kitchen cleaning hacks come in handy here.
How to clean the Ninja coffee maker water reservoir
The water reservoir is easy to overlook, yet it’s where mineral buildup and slime start. To clean your water reservoir, Ninja’s experts suggest emptying it and hand-washing it, or placing it in your dishwasher: “For a better clean, we recommend placing it in the bottom rack of the dishwasher, standing upright with the opening facing downward.” For a chemical-free refresh between deep cleans, empty and rinse the water tank, then wipe it dry. If you prefer a natural approach, a diluted apple cider vinegar rinse can also freshen the reservoir before a thorough rinse with plain water.
Cleaning the Ninja Specialty Coffee Maker and taking it apart
The Ninja Specialty Coffee Maker cleans much like the drip models, and other machines often follow the same cleaning steps listed for the Ninja Specialty Coffee Maker. To take a Ninja coffee maker apart for cleaning: remove the brew basket first (best left until after the brewer has cooled), then clean the frother whisk, and finally cleanse the carafe and run a brew-through with clean water. Reassemble only once every part is fully dry. Regular attention to these components is genuinely the best way to keep any Ninja coffee maker brewing great coffee for years.
FAQ
Can you put Ninja coffee maker parts in the dishwasher?
Most removable parts are dishwasher safe on the top rack, including the glass carafe, lid, permanent filter, removable filter holder, reservoir flip-top lid, frother whisk and scoop. The pod adapter is the exception — always hand-wash it in warm, soapy water.
How often should I descale my Ninja coffee maker?
Every one to three months for most homes, and more often in hard-water areas. Many models show a descaling reminder or CLEAN light when it’s time, so you rarely have to track it yourself.
Why won’t my CLEAN light turn off?
It should switch off once a full cleaning cycle finishes and the machine rinses through. If it stays on, unplug the machine for a minute and restart it — resetting the power usually clears the indicator.
Does white vinegar damage a Ninja coffee maker?
Diluted white vinegar is safe for the drip and DualBrew water paths, but rinse well afterwards to remove the smell. On the Luxe Café espresso path, stick to descaling through the tank and avoid vinegar in the portafilter, as it can affect the rubber O-rings over time.
What can I use instead of Ninja descaling solution?
Diluted white vinegar or food-safe citric acid both work well for descaling the reservoir and boiler. Cleaning tablets are the tidiest option for espresso-style models with a backflush disk.
How do I know when my Ninja coffee maker needs cleaning?
Watch for slower brewing, weaker flavour, visible mineral buildup or the machine’s own indicator light. Any of these is your cue to run a cleaning or descaling cycle.