Résumer cet article avec :
 Claude
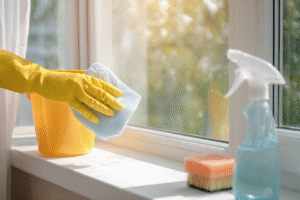
Feeling a bit overwhelmed by those grimy outside windows blocking your view? We totally get it. At Wecasa, we connect you with cleaning professionals who make sparkling windows look effortless, but we also believe in empowering you with the know-how to tackle this task yourself.
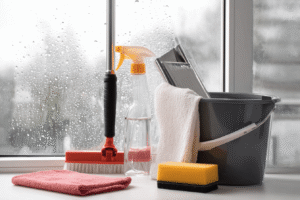
What You’ll Need: Essential Cleaning Tools and Solutions
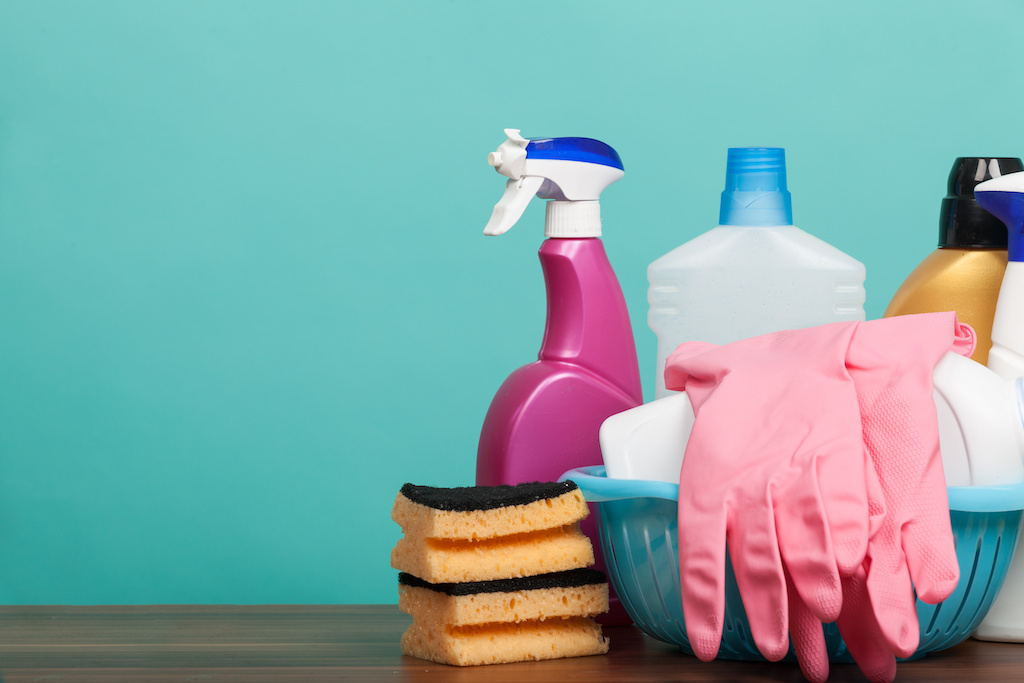
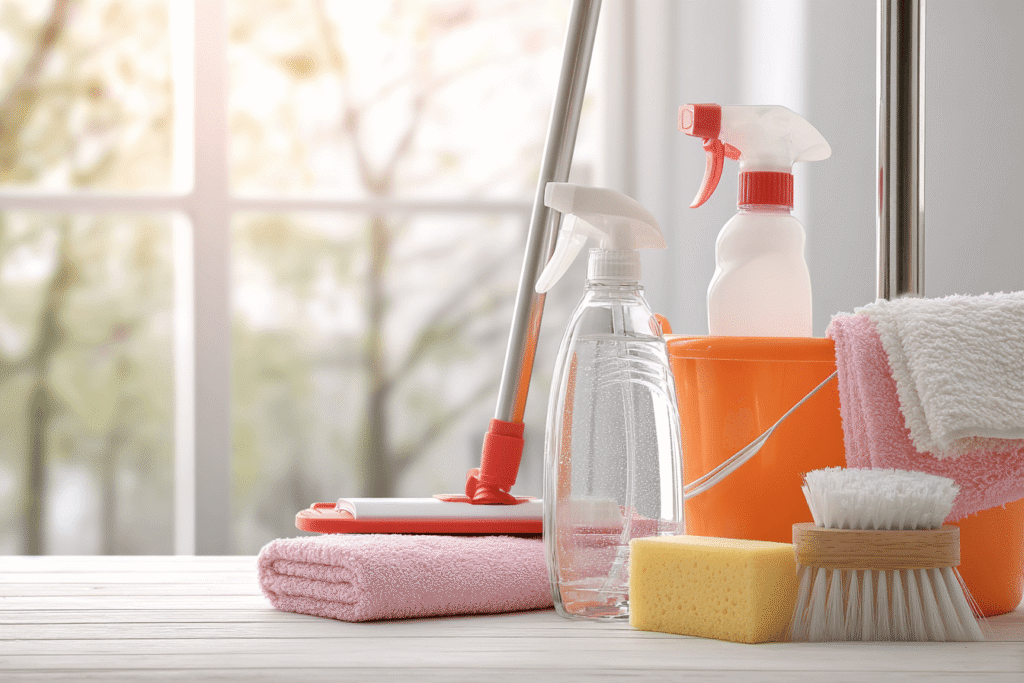
Basic Window Cleaning Kit
Getting your hands on the right tools makes all the difference between frustrating smears and crystal-clear results. Your window cleaning equipment should include:
- Squeegee (30cm works best for most residential windows)
- Microfiber cloths for drying and polishing
- Extension pole to reach high windows safely from the ground
- Bucket for your window cleaning solution
- Scrubber or T-bar with washable sleeve
- Spray bottle for targeted cleaning
Top Tip: Professional window cleaning services swear by the “S-technique” with squeegees – start at the top corner and pull down in overlapping strokes.
You don’t need to break the bank here. A quality squeegee and extension pole will serve you for years, whilst microfiber cloths and scrubber sleeves are your main replaceable items.
Homemade vs Commercial Cleaning Solutions
What’s your fancy – mixing your own or grabbing something off the shelf? Both approaches have their merits, and the best way depends on your priorities.
Homemade solutions shine when you want control over ingredients. A mixture of equal parts white vinegar and water cuts through grime brilliantly, whilst dish soap (just a few drops) tackles greasy fingerprints. These natural options are gentler on window frames and won’t leave harsh chemical residues.
Commercial cleaners offer convenience and consistency. They’re formulated to evaporate quickly, reducing streaking, and often work faster on stubborn stains. Perfect when you need guaranteed results without the mixing faff.
| Solution Type | Best For | Cost |
|---|---|---|
| Homemade | Regular cleaning, eco-friendly approach | £0.50 per litre |
| Commercial | Quick results, stubborn stains | £3-5 per bottle |
Best Tools for Different Window Types
Different window types demand specific approaches, and your team of tools should match the challenge. Standard residential windows work brilliantly with a basic squeegee and microfiber cloth combo, giving you that clear view without fuss.
High or second-storey windows need an extension pole – carbon fibre versions offer the best strength-to-weight ratio. You’ll maintain control whilst working from ground level, keeping you safe and your results professional.
French windows or multi-paned glass require smaller tools. A 15cm squeegee navigates those edges of the window more effectively than larger alternatives. Window cleaners often switch between sizes mid-job for this reason.
Tinted windows deserve gentler treatment – avoid abrasive pads and stick to soft microfiber cloths. The same applies to commercial building installations where scratches mean expensive replacements.
Top Tip: Match your tool size to your window pane dimensions. Working in straight lines becomes much easier when your squeegee covers the width properly, saving time and delivering better results.
When Weather Works Against You: Best Time to Clean
Weather can make or break your window cleaning session, and timing matters more than you might think. Overcast days with mild temperatures between 10-23°C offer the sweet spot – your cleaning solution won’t evaporate too quickly, preventing those annoying streaks.
Avoid direct sunlight and windy conditions at all costs. Heat causes solutions to dry before you can squeegee properly, whilst wind blows dust straight back onto wet glass. Spring and autumn deliver the most reliable conditions, giving you enough time to work without racing against the elements.
| Weather Condition | Recommendation | Why |
|---|---|---|
| Overcast, mild | Perfect | Solution dries slowly, no streaks |
| Sunny, hot | Avoid | Rapid evaporation causes streaks |
| Windy | Avoid | Dust and debris stick to wet glass |
Pro Tip
Early morning or late afternoon sessions work brilliantly — you’ll dodge the heat whilst enjoying natural light for spotting missed areas.
How to Clean Outside Windows: Step-by-Step Method
Step 1: Remove Screens and Prep the Area
First step: carefully detach window screens from their frames. Most screens lift out by pushing tabs inward at the bottom, then pulling the side of the window screen towards you. Handle with care – the mesh tears easily if you rush.
Set up your workspace on level ground with a sturdy ladder positioned safely. Clear furniture, potted plants, and decorations from the area. Lay down old paper towels or a tarp to protect surfaces below.
Service providers recommend checking each screen for damage before cleaning – small tears become big problems when wet. Clean screens separately using gentle circular motion with soapy water, then rinse and prop against a wall to dry completely.
Remember: proper preparation prevents poor performance. Taking time now saves you repeating the job later.
Step 2: Rinse Away Surface Dirt
Start with a proper rinse – your garden hose becomes your best mate for this job. Use gentle pressure to wash away loose dirt, dust, and debris that’s accumulated on the glass surface. This prevents scratching when you move to the scrubbing stage.
Work from top to bottom across each window pane, allowing gravity to help carry dirt downwards. Professional technicians often recommend this approach for the most efficient cleaning process.
- Close all windows before you begin
- Spray systematically across the entire glass surface
- Pay attention to corners where grime typically builds up
- Check for stubborn spots that need extra attention
Top Tip
Keep your hose pressure moderate — too much force can splash dirty water back onto areas you’ve already rinsed, affecting your overall look and requiring you to start again.
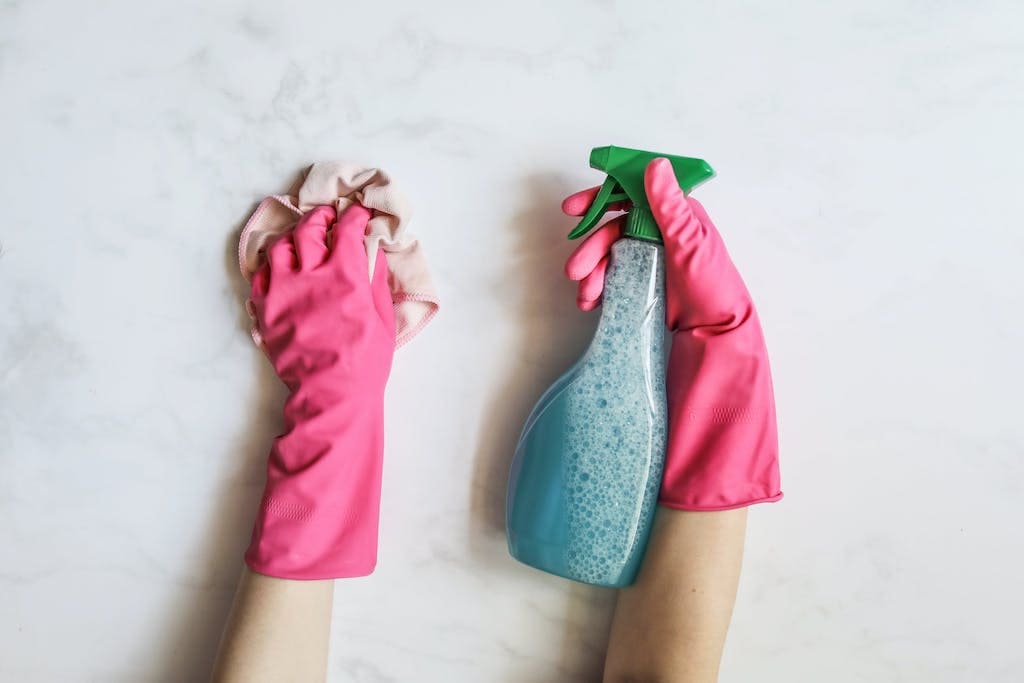
Step 3: Apply Your Cleaning Solution
Now comes the satisfying bit – getting that cleaning solution working for you. Dip your scrubber or sponge into your chosen mixture, ensuring it’s thoroughly saturated but not dripping everywhere.
Work systematically from top to bottom across each window pane, applying the solution in overlapping sections. This prevents the mixture from drying before you can squeegee it off – nobody wants those pesky streaks ruining their hard work.
| Application Method | Best For | Technique |
|---|---|---|
| Scrubber/sponge | Standard windows | Circular motions, even coverage |
| Strip applicator | Large panes | Long strokes, overlap slightly |
| Spray bottle | Small windows | Multiple light coats |
Allow the solution to sit for 30-60 seconds – this gives it time to break down stubborn grime without drying completely.
Step 4: Scrub Away Stubborn Grime
Time to tackle those persistent spots that regular rinsing won’t shift. Use circular motions with your scrubber or soft-bristled brush, applying gentle pressure to break down built-up dirt without scratching the glass.
Focus on problem areas where grime tends to gather – window corners, edges near the frame, and any visible water spots or bird droppings. For particularly stubborn deposits, let your cleaning solution sit for an extra minute before scrubbing.
Rinse your scrubber frequently in clean water to avoid spreading dirt across the glass surface. This prevents you from simply moving grime around rather than removing it completely.
Remember: patience beats pressure every time. Gentle, persistent scrubbing with the right technique delivers better results than aggressive scrubbing that risks damaging your windows.
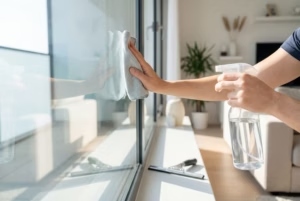
Step 5: Squeegee for Streak-Free Finish
Here’s where the magic happens – your squeegee transforms soapy windows into crystal-clear perfection. Position the blade at the top corner and pull down in one smooth, straight motion, maintaining consistent pressure throughout.
Wipe your squeegee blade with a clean microfibre cloth after each stroke – this prevents dragging dirty water across clean glass. Work systematically across the window, slightly overlapping each pass.
- Start fresh each stroke from the top edge
- Keep blade contact with glass throughout the motion
- Finish at the bottom without lifting mid-way
Top Tip: For detailed squeegee techniques and professional secrets, check out our comprehensive guide on cleaning windows with a squeegee for brilliant, streak-free results every time.
How Do You Clean Outside Windows Without Streaks?
Professional Squeegee Technique
Master the fanning method – the technique professionals swear by for brilliant results. Rather than dragging straight down, use short overlapping strokes in different directions across the glass surface.
Hold your squeegee at a consistent 45-degree angle, applying gentle pressure. Start at the top corner and work in controlled S-shaped movements, never lifting the blade mid-stroke.
| Technique | Best For | Key Benefit |
|---|---|---|
| Straight pull | Small panes | Quick coverage |
| S-pattern | Large windows | Even water removal |
| Fanning method | All sizes | Professional finish |
Wipe the blade between each pass using a clean microfibre cloth – this prevents dragging dirty water across your freshly cleaned surface.
Pro Tip: Practice makes perfect with squeegee work. The great discount you’ll get from avoiding professional services makes mastering this technique worthwhile – thanks to consistent practice, you’ll achieve streak-free windows every time.
Microfibre Cloth Method
Perfect for smaller windows or when you prefer hands-on control over your cleaning process. This method delivers excellent results without requiring squeegee skills.
Use two separate microfibre cloths – one slightly damp for cleaning, one completely dry for polishing. The damp cloth lifts dirt and grime, whilst the dry cloth buffs away any remaining moisture.
| Cloth Type | Purpose | Technique |
|---|---|---|
| Waffle weave (damp) | Initial cleaning | Circular motions |
| Smooth weave (dry) | Final polish | Straight lines top to bottom |
Work from top to bottom using gentle pressure with your damp cloth, then immediately follow with the dry cloth to prevent water spots forming.
Pro Tip: Fold each cloth multiple times – this gives you fresh, clean surfaces to work with as sections become dirty, extending their effectiveness throughout your cleaning session.
Tackling Hard-to-Reach Windows Safely
Extension Pole Solutions
Skip the ladder drama and reach those second-storey windows safely from ground level. Extension poles transform risky climbing into straightforward cleaning, letting you tackle heights up to 25 feet without breaking a sweat.
Choose your pole wisely – telescopic models offer the best flexibility for varying window heights. Look for lightweight aluminium or carbon fibre construction that won’t tire your arms during longer sessions.
| Pole Type | Price Range | Best For |
|---|---|---|
| Basic telescopic | £25-45 | Single-storey extensions |
| Professional grade | £60-120 | Multi-storey homes |
| Window vac compatible | £40-80 | Streak-free finish |
Attach your squeegee securely before extending – nothing’s more frustrating than watching your tool plummet mid-clean. Most poles feature universal fittings that work with standard squeegees and scrubber attachments.
Pro Tip: Start with the pole at minimum length to get your technique sorted, then gradually extend as you gain confidence – this prevents wobbling and delivers consistently brilliant results.
Magnetic Window Cleaners
Fancy cleaning both sides simultaneously? These clever gadgets use powerful magnets to stick together through your glass, letting you tackle exterior surfaces from the comfort of indoors.
Perfect for flats and upper floors where ladders aren’t practical. The two-piece design means one half stays safely inside whilst the magnetic partner follows your movements on the outside, cleaning both surfaces at once.
| Window Thickness | Magnet Strength | Best For |
|---|---|---|
| 3-8mm (single glazing) | Standard | Traditional windows |
| 15-28mm (double glazing) | Heavy duty | Modern homes |
| 30mm+ (triple glazing) | Ultra-strong | Energy-efficient properties |
Remember the safety rope – most models include a tether to prevent the outside piece from taking a tumble if the magnets separate mid-clean.
Pro Tip: Test the magnetic grip on a small corner first – if your double glazing is thicker than expected, you’ll need a stronger model to maintain proper contact and avoid frustrating drop-offs during cleaning.
Ladder Safety Guidelines
When extension poles won’t reach and magnetic cleaners aren’t suitable, ladders become your only option – but safety must come first.
Check your ladder’s condition before each use. Look for bent rungs, loose bolts, or damaged feet that could spell disaster mid-climb. A wobbly ladder isn’t worth the risk.
| Safety Check | What to Look For | Action Required |
|---|---|---|
| Rungs | Cracks, bends, loose fittings | Replace immediately |
| Feet | Wear, missing rubber | Secure properly |
| Locks | Smooth operation | Oil if stiff |
Set up on level ground away from power lines, using the 4:1 rule – for every 4 feet of height, place the base 1 foot from the wall. Never lean against gutters or window frames that might give way.
Keep three points of contact at all times – two hands and one foot, or two feet and one hand. Your cleaning supplies should hang from a belt or ladder hook, keeping both hands free for climbing.
Top Tip: Have someone spot you from below whenever possible – they can steady the ladder and pass up tools, making the whole job safer and more efficient.
Cleaning Solutions That Actually Work
Vinegar-Based Natural Cleaners
White vinegar transforms into your most reliable cleaning partner – this natural powerhouse cuts through grime whilst keeping your family safe from harsh chemicals.
Mix equal parts distilled water and white vinegar in a spray bottle for the classic solution that delivers streak-free results every time. The acidity breaks down dirt and mineral deposits without damaging your glass.
| Solution Type | Ratio | Best For |
|---|---|---|
| Basic vinegar | 1:1 water to vinegar | Regular cleaning |
| Heavy-duty | 2:1 vinegar to water | Stubborn stains |
| Scented version | Add 5 drops essential oil | Masking vinegar smell |
Fancy something stronger? Add a few drops of washing-up liquid to your vinegar solution – this tackles greasy fingerprints and outdoor grime more effectively.
Remember: avoid using vinegar on stone window sills, as the acid can cause damage over time.
Handy Tip: Clean on overcast days when vinegar won’t dry too quickly, preventing those frustrating streaks that ruin your hard work.
Best Commercial Window Cleaners
Commercial cleaners deliver consistent results when you need reliable performance every time. Windex remains the household favourite – its ammonia-based formula cuts through grime effectively, though the smell can be overpowering outdoors.
Invisible Glass earns professional approval for its streak-free finish and lighter scent. The formula works brilliantly on tinted windows without leaving residue that cheaper alternatives often produce.
| Brand | Price Range | Specialty |
|---|---|---|
| Windex Complete | £3-5 | Heavy-duty grime |
| Invisible Glass | £4-6 | Streak-free finish |
| Zep Professional | £8-12 | Commercial grade |
Zep Professional tackles the toughest jobs – perfect for windows that haven’t seen attention in months. The concentrated formula means better value despite the higher upfront cost.
Dawn Dish Soap: The Professional’s Choice
Why do professional window cleaners swear by Dawn? This blue bottle delivers grease-cutting power that leaves commercial cleaners in the dust.
Mix just a few drops with warm water – you’ll be amazed how this simple solution tackles stubborn grime that defeats pricier alternatives. Dawn’s formula glides smoothly under your squeegee whilst breaking down dirt and fingerprints effortlessly.
The secret lies in Dawn’s surfactant blend, originally designed for cutting through cooking grease. Outdoor windows collect everything – tree sap, bird droppings, traffic film – and Dawn handles it all without leaving residue.
Dealing with Stubborn Stains and Build-Up
Hard Water Stains and Mineral Deposits
Those chalky white spots driving you mad? Hard water leaves mineral deposits that regular cleaning won’t budge, but the right approach sorts them quickly.
White vinegar works wonders – spray a 50/50 vinegar-water solution directly onto stains and let it sit for 10 minutes. The acid breaks down calcium and magnesium buildup naturally.
For stubborn deposits, create a baking soda paste with water. Apply generously, scrub gently with a soft cloth, then rinse thoroughly. This method removes years of mineral accumulation without scratching your glass.
Top Tip: Clean hard water stains during cooler parts of the day – heat makes solutions evaporate too quickly, reducing their effectiveness and potentially leaving new streaks behind.
Paint Splatters and Adhesive Residue
Paint splatters need gentle persistence – rushing the job often spreads the mess rather than removing it.
Start with warm soapy water applied generously to soften dried paint. Let it sit for several minutes before attempting removal. For stubborn spots, rubbing alcohol works wonders – dab it onto a microfiber cloth and work in circular motions.
Plastic scrapers become your secret weapon for lifting paint without scratching glass. Hold at a 45-degree angle and work slowly. Avoid metal tools that can damage window surfaces permanently.
| Removal Method | Best For | Safety Rating |
|---|---|---|
| Warm soapy water | Fresh latex paint | High |
| Rubbing alcohol | Dried water-based paint | High |
| Plastic scraper | Thick paint layers | Medium |
Pressure Washer vs Traditional Methods
Pressure washers promise speed but traditional window cleaning deliver control – each approach suits different situations and skill levels.
Pressure washing covers large areas quickly and removes stubborn grime that manual scrubbing struggles with. However, traditional squeegee methods offer precision without risking damage to window seals or frames.
| Method | Speed | Risk Level | Best For |
|---|---|---|---|
| Pressure washer | Fast | Medium-High | Large properties, heavy soiling |
| Traditional | Moderate | Low | Delicate frames, precise control |
Consider your windows before choosing – older frames and double-glazed units often suit gentle hand cleaning better than high-pressure water.
How Often Should You Clean Outside Windows?
Frequency depends on your location and lifestyle – but getting the timing right saves you effort whilst keeping your home looking brilliant.
Most homes benefit from twice-yearly deep cleans during spring and autumn. However, your specific situation determines whether you need more frequent attention.
| Location Type | Recommended Frequency | Key Factors |
|---|---|---|
| Urban/City centre | Every 1-2 months | Pollution, traffic grime |
| Coastal areas | Monthly | Salt spray, sand particles |
| Suburban/Rural | Every 2-3 months | Pollen, tree debris |
| Dusty environments | Every 4-6 weeks | Construction, farming nearby |
Consider these factors when planning your cleaning schedule:
- Heavy pollen seasons require extra attention
- Rainy periods followed by sunshine create stubborn water spots
- Nearby construction or roadwork increases dirt accumulation
Common Mistakes That Leave Windows Worse
Even experienced cleaners fall into these traps – and they’ll sabotage your hard work faster than you’d expect.
Cleaning in direct sunlight ranks as the biggest blunder. Your solution dries before you can squeegee properly, leaving stubborn streaks that resist removal. Choose overcast days or work in shade whenever possible.
Using paper towels or cotton rags creates lint disasters. These materials shed fibres that stick to damp glass, making windows look dusty despite your efforts. Microfibre cloths prevent this frustration entirely.
Skipping the dusting step spreads dirt around. Loose debris turns into muddy smears when mixed with cleaning solution, requiring you to start over.
| Mistake | Result | Easy Fix |
|---|---|---|
| Sunny day cleaning | Streaky windows | Work in shade |
| Wrong cloths | Lint residue | Use microfibre only |
| No pre-dusting | Muddy smears | Dust frames first |
Top Tip
Too much cleaning solution causes more problems than too little — excess soap creates streaks that are harder to remove than the original dirt.
When to Call Professional Window Cleaning Services
Benefits of Professional Cleaning
Professional window cleaning delivers results that DIY methods simply can’t match. Trained specialists bring commercial-grade equipment and expertise that transforms your home’s appearance whilst protecting your investment.
Key advantages include:
- Streak-free perfection – professionals achieve crystal-clear results using specialised techniques and solutions
- Safety first approach – no ladder risks or dangerous stretching for hard-to-reach windows
- Time savings – your weekend stays free whilst experts handle the labour-intensive work
- Extended window lifespan – proper cleaning prevents mineral buildup and frame damage that leads to costly replacements
Professional services also spot potential problems early – from damaged seals to frame issues that could cost you hundreds later.
What Cleaning Companies Actually Use
Professional window cleaning companies rely on specialised equipment that delivers consistent results across hundreds of properties daily.
Commercial-grade squeegees from brands like Unger and Ettore dominate the market – these aren’t your average household tools. Professional models feature precision rubber blades and ergonomic handles designed for extended use.
Water-fed pole systems revolutionise exterior cleaning by pumping purified water through telescopic poles, eliminating the need for ladders whilst achieving streak-free results on multi-storey buildings.
| Equipment Type | Professional Brand | Key Advantage |
|---|---|---|
| Squeegees | Unger ErgoTec | Precision rubber blades |
| Extension poles | Phantom water-fed | Reaches 40+ feet safely |
| Cleaning solution | Dawn dish soap mix | Grease-cutting power |
Distilled water becomes the secret weapon – hard tap water contains minerals that leave spots, whilst purified water dries completely clear.
Maintaining Your Windows Between Deep Cleans
Regular touch-ups keep your windows sparkling without the full cleaning routine every few weeks.
Keep a spray bottle filled with your preferred cleaning solution handy for quick spot cleaning. A simple wipe with a microfibre cloth removes fingerprints, bird droppings, and light dust before they build up into stubborn grime.
Dust window frames and sills weekly using a soft brush or cloth. This prevents debris from washing onto clean glass during your next proper clean. Check for cobwebs around corners – they collect dirt that eventually streaks across your windows.
| Quick Maintenance Task | Frequency | Time Required |
|---|---|---|
| Spot cleaning marks | As needed | 2 minutes |
| Frame dusting | Weekly | 5 minutes |
| Cobweb removal | Fortnightly | 3 minutes |