Summarise this article with:
 Claude
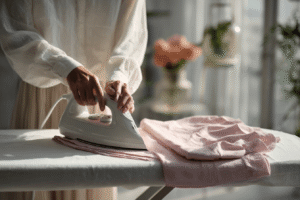
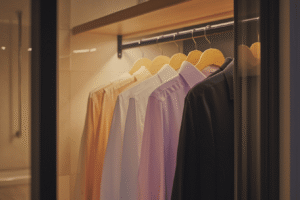
A crisp, perfectly pressed blazer can transform your entire look, whether you’re heading to that important meeting or stepping out for dinner. We know the feeling when your favourite jacket emerges from the wardrobe looking less than stellar, and you’re wondering if you dare tackle it with an iron at home.

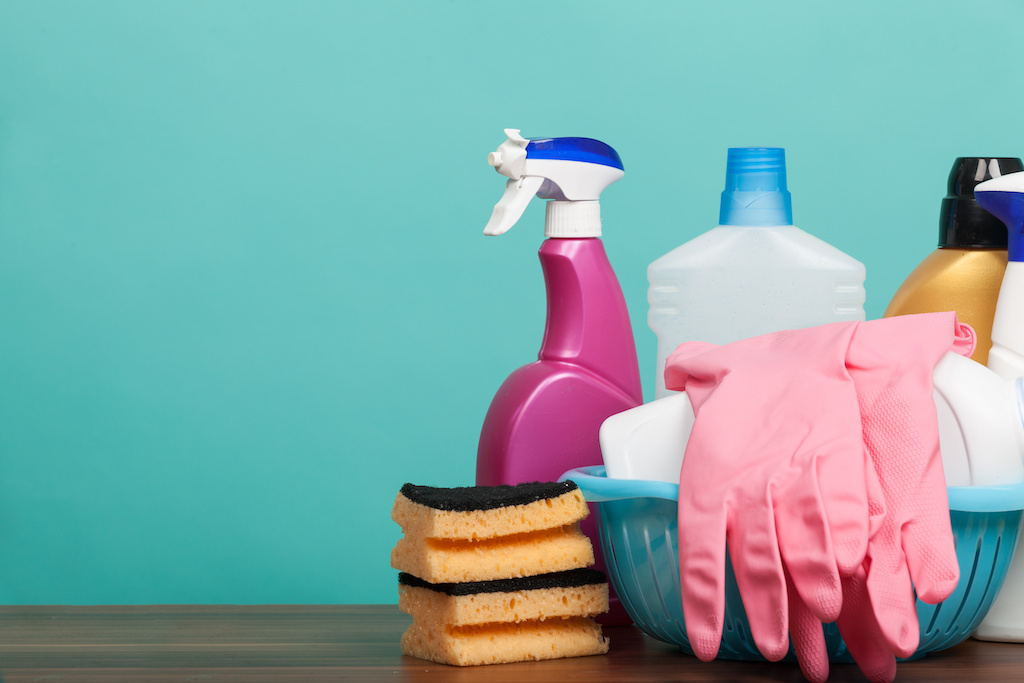
What you’ll need to iron your blazer
Getting your blazer looking sharp starts with having the right tools at hand. You don’t need anything fancy – just a few essentials will do the trick perfectly.
Essential kit for blazer ironing:
- Steam iron with adjustable heat settings
- Sturdy ironing board with a clean, padded surface
- Pressing cloth (thin cotton or muslin) to protect delicate fabrics
- Spray bottle filled with distilled water for stubborn wrinkles
- Clean tea towel as an alternative pressing cloth
Pro Tip: Check that your iron is clean before starting, if not, a simple baking soda and water paste works wonders for cleaning your iron – no one wants mysterious marks on their favourite blazer!
Fabric first: identifying your blazer material
Wool and tweed blazers
Delicate materials like wool and tweed require special attention and a gentler approach than your average cotton shirt. These natural fibres can easily develop shiny marks or even scorch if you’re too heavy-handed with the heat.
Key steps for wool and tweed:
- Always use the wool setting on your iron or the lowest temperature available
- Place a pressing cloth between the iron and fabric to prevent direct contact
- Work with lower temperature and plenty of steam rather than pressure
- Turn the blazer inside out when possible to protect the outer surface
Pro tip: If your wool blazer develops a shiny spot, gently buff it with white vinegar on a clean cloth – this can often restore the fabric’s natural texture and save your favourite piece.
Cotton and linen suits
Cotton and linen blazers are much more forgiving than their wool counterparts, allowing you to use higher heat settings for best results. These natural fibres actually benefit from steam and heat, making them perfect for achieving that professional look you’re after.
What makes cotton and linen different:
- Use the cotton/linen setting or high heat on your iron for optimal performance
- These fabrics respond brilliantly to steam – fill that water reservoir up
- Work while the fabric is slightly damp for easier wrinkle removal
- Iron on the reverse side to prevent any potential shine on the outer surface
Pro tip: For stubborn creases on linen, lightly mist the fabric with water and let it sit for 5-10 minutes before ironing – the moisture will penetrate the fibres and make those wrinkles disappear like magic.
Polyester and synthetic blends
Synthetic materials can be tricky customers – they’re heat-sensitive and require a completely different approach from natural fibres. The good news? Once you know the rules, polyester blazers are actually quite straightforward to iron with brilliant results.
Temperature control is everything:
- Use the synthetic setting or lowest heat available on your iron
- Never exceed 110°C – synthetic fibres can melt or develop permanent shiny patches
- Place a pressing cloth between iron and fabric to prevent direct contact
- Work inside out when possible to protect the outer surface
Pro tip: Steam is your secret weapon with synthetic blends – use your handheld steamer or iron’s steam function rather than pressure to relax stubborn wrinkles, keeping the iron moving constantly across the flat surface.
Preparing your blazer for ironing
Inspect for stains and marks
Check your blazer thoroughly before heating up that iron – this step could save you from turning a small coffee spot into a permanent reminder of Monday morning mishaps.
Start with these inspection areas:
- Collar and cuffs where skin contact leaves the most marks
- Front panels and pocket areas for food spills or pen marks
- Underarm sections for any sweat stains or deodorant residue
- Sleeve areas particularly around the elbows where wear shows first
Hold your blazer up to good lighting and examine both the outer fabric and pocket linings. Run your hands gently over the surface – sometimes you’ll feel sticky spots before you see them.
Found a stain? Treat it immediately with appropriate spot cleaning before you even think about ironing. Heat will set stains permanently into the fibres, making them nearly impossible to remove later.
Top tip: Keep a lint roller handy during your inspection – it’ll help you spot any marks hiding under surface dust and leave your blazer ready for that perfect press.
Set up your ironing station
Creating the perfect workspace makes all the difference between a frustrating ironing session and professional results that’ll make your blazer look like it’s fresh from the dry cleaner.
Your ironing station essentials:
- Clean, sturdy ironing board set at hip height for comfortable working
- Well-lit area where you can spot every wrinkle clearly
- Distilled water in your iron to prevent mineral buildup
- Pressing cloth (a clean white cotton tea towel works brilliantly)
- Spray bottle filled with clean water for stubborn creases
Position your ironing board near a flat surface like a bed or table where you can lay parts of the blazer while working on specific sections. This prevents the weight of the suit jacket from pulling and creating new wrinkles as you iron.
Top tip: Test your iron on an inconspicuous area first – the inner pocket linings are perfect for this, ensuring your heat setting won’t damage the outer fabric.
Step-by-step: how to iron a blazer at home
Start with the lining inside out
Turn your blazer completely inside out and lay the lining flat across your ironing board. This protects the outer fabric from potential heat damage whilst allowing you to tackle wrinkles effectively.
Begin with the pocket linings – pull them out gently and press them smooth first. This prevents lumps and bumps showing through when you flip the blazer back over.
Use gentle, pressing motions rather than sliding the iron across the lining. Most blazer linings are synthetic and can easily develop shiny patches if you’re too aggressive with heat or pressure.
Work systematically from the back panel around to the front sections, keeping the iron moving steadily. Pay special attention to areas where the lining meets seams – these spots often hold the most stubborn creases.
Pro tip: Keep your iron on a medium-low setting for lining work – even if the outer fabric can handle higher heat, the lining typically requires gentler treatment to avoid melting or puckering.
Iron the sleeves without creasing
Sleeves demand your most careful attention – they’re the trickiest part of any blazer and where amateur ironing mistakes show most clearly.
Insert a rolled towel or magazine inside each sleeve to create a firm, rounded surface that prevents unwanted creases from forming. This mimics the professional sleeve board technique used by dry cleaners.
Focus on the centre of each sleeve only, working from shoulder seam down to the cuff. Never iron over the edges where the sleeve meets your ironing board – this creates sharp military-style creases that look out of place on civilian blazers.
Use smooth, downward strokes with your pressing cloth in place, keeping the iron moving constantly. The rolled towel inside maintains the sleeve’s natural shape whilst you work.
Pro tip: If you don’t have a sleeve board, a thick rolled magazine wrapped in a tea towel works perfectly – just ensure it’s sturdy enough to provide proper support while you iron.
Tackle the body and back panel
Lay your blazer flat on the ironing board with the back facing upward – this substantial section requires a straightforward process working from top to bottom in smooth, controlled movements.
Begin at the shoulders and work downward using your pressing cloth to protect the fabric. Focus on the outer edges first, then move inward toward the centre seam, ensuring you don’t create unwanted creases along the way.
Pay special attention to any vents – if your blazer has side or centre vents, align them properly before pressing. Place a piece of paper between vent layers to prevent marking the underneath fabric.
For the front panels, work on half of the front at a time, carefully navigating around pockets and buttons. Never iron directly over buttons – work around them to maintain the blazer’s structure and avoid damaging your iron’s surface.
Pro tip: Once finished, immediately hang your blazer on a sturdy hanger – this prevents new wrinkles forming and helps maintain the pressed shape while you tackle your shirt or other garments in your wardrobe.
Perfect the collar and lapels
The collar and lapels are where your blazer’s character truly shines – they frame your face and create that sharp, professional silhouette that separates a well-pressed jacket from a hastily thrown-together look.
Start with the collar popped upward and work from the centre outward using your pressing cloth. Never press the collar completely flat – maintain its natural curve by following the contours rather than flattening them against the board.
For the lapels, resist the urge to create sharp creases – quality blazers feature a gentle “lapel roll” that should flow naturally from collar to button. Work with light pressure, moving the iron in smooth strokes that follow the lapel’s natural shape.
Top tip: Check your blazer’s care instructions before tackling structured areas – blazers with shoulder pads or heavy interfacing may need lower heat settings to prevent the internal structure from warping or melting.
How to get wrinkles out without an iron
Steamy shower bathroom method
Do you want to iron your wrinkled blazer without an iron ? Your bathroom can become an instant steaming station that rivals professional equipment. This clever method works brilliantly for light to medium wrinkles without risking heat damage.
Here’s how to master the shower steam technique:
- Hang your blazer on a sturdy hanger away from the shower head to avoid water spray
- Turn your shower to the hottest setting and close the bathroom door completely
- Let the steam work for 15-20 minutes while the humid heat relaxes fabric fibres
- Smooth any remaining creases by hand once you remove the blazer
Pro tip: This method works best on natural fabrics like wool and cotton – synthetic blends may need a quick professional cleaning service if wrinkles persist after steaming.
Gentle steaming techniques
A handheld steamer offers the most controlled approach for tackling wrinkles without the weight and pressure of traditional ironing methods.
Hold your steamer 6 inches away from the fabric and work in slow, vertical downward strokes. The steam penetrates fibres naturally whilst gravity helps pull wrinkles smooth – this combination delivers salon-quality results every time.
Focus on heavily creased areas first, allowing the steam to work for several seconds before moving on. For stubborn wrinkles, gently pull the fabric taut with your free hand whilst steaming.
Top tip: After steaming, let your blazer hang undisturbed for 10 minutes – this allows the moisture to evaporate completely and helps prevent new wrinkles forming.
How do you iron suit trousers and pants?
Suit trousers deserve the same careful attention as your blazer to complete that sharp, polished look. The key difference lies in working with two fabric layers whilst maintaining those crisp front creases.
Start by checking your trouser care label and set your iron to the appropriate temperature – wool needs lower heat than cotton. Turn trousers inside out first and gently press the pocket linings to prevent them showing through.
Slip the waistband over your ironing board’s narrow end with the fly facing down. Work around the waistband systematically, then tackle each leg individually. Align the front and back seams precisely before pressing – this creates that professional centre crease.
Use a press-and-lift motion rather than sliding the iron across the fabric. This prevents unwanted shine, especially on darker materials.
Top tip: For razor-sharp creases, fold each trouser leg along its natural crease line and press firmly – the weight of the iron does the work, not pressure from your hand.
Top tips for wrinkle-free blazers
Prevention beats correction every single time – these simple habits will keep your blazers looking immaculate between wears and reduce your ironing workload dramatically.
Invest in quality wooden hangers with broad shoulders to maintain your blazer’s natural shape. Wire hangers create pressure points that lead to permanent creases, whilst padded hangers prevent fabric stretching.
Key maintenance strategies:
- Brush your blazer after each wear using a clothes brush to remove surface dirt and restore fabric texture
- Allow 24 hours between wears to let natural fibres recover and minor wrinkles relax
- Store in breathable garment bags rather than plastic covers that trap moisture
- Rotate your blazer collection to prevent overuse of favourite pieces
Address minor wrinkles immediately rather than letting them set – a quick steam or overnight hanging often prevents major ironing sessions.
Pro tip: Keep a professional ironing service contact handy for your most valuable blazers – sometimes the investment in expert care pays dividends in extending garment lifespan and maintaining that perfect finish.
Why not let Wecasa help with your ironing?
Feeling overwhelmed by that growing pile of blazers and shirts? We get it – between work, family, and everything else life throws at you, who has time to perfect the art of collar pressing?
Our trusted professionals bring years of experience straight to your doorstep. They handle everything from delicate wool blazers to tricky synthetic blends, using the right techniques for each fabric type.
| Service Benefits | What You Get |
|---|---|
| Flexible booking | Same-day availability when you need it most |
| Expert care | Professionals trained in garment-specific techniques |
| Affordable rates | Starting from just £16.90/hour with no hidden fees |
Book through our app in just two taps and spend your time on what matters most. Whether it’s a last-minute interview or weekly wardrobe maintenance, we’ve got you covered.
Top tip: Combine your ironing session with our domestic cleaning services for a complete home refresh – many customers find this saves both time and money while keeping their entire wardrobe immaculate.