Résumer cet article avec :
 Claude
Water marks on walls are a common problem in many homes, often caused by leaks, condensation, or rising damp. While they may seem like a minor aesthetic issue, they can also be a warning sign of more serious underlying moisture problems. Ignoring them can lead to mould growth, structural damage, and persistent dampness. In this guide, our expert domestic cleaners will let you in in the causes of water marks, methods for removing them, and the best ways to prevent future stains.

Understanding Water Marks on Walls
What Causes Water Stains on Your Walls?
Water stains on walls can appear for various reasons, including:
- Leaking pipes or plumbing issues
- Roof damage allowing water infiltration
- Condensation from poor ventilation
- Window seal failures
- Rising damp from ground moisture
Different Types of Water Marks
Water stains can appear in various forms, each indicating different underlying problems:
- Brown or yellow rings – Often a sign of water damage from leaks.
- White chalky marks – Usually caused by mineral deposits from hard water.
- Dark patches – Suggest active moisture problems and potential mould growth.
- Streaky water trails – Occur when water runs down walls, leaving visible residue.
Methods to Remove Water Marks
Cleaning water stains on painted walls and ceilings
Tired of staring at those pesky wall marks? Cleaning your walls might seem daunting, but don’t worry – we’ve got your back with this easy step-by-step guide!
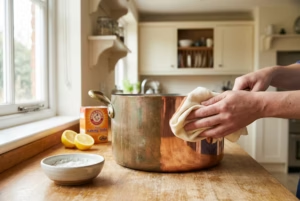
Step 1: Start by mixing equal parts of warm water and white vinegar in a bowl or spray bottle. Dip a clean, soft cloth or sponge into the vinegar mixture and gently dab it onto the stained area. Avoid scrubbing too hard, as this can damage the paint. If using a spray bottle, lightly mist the affected spot and let the solution soak into the stain for better absorption.
Step 2: Allow the vinegar mixture to sit on the stain for about 10 minutes, to break down the water stain and loosen any mineral residue. Then use a clean, damp cloth to gently wipe the treated area. If the mark is still visible, repeat the process until the stain disappears.
Step 3: After removing the stain, it’s important to dry the wall thoroughly to prevent moisture buildup. Use a dry towel to pat the area dry, and if possible, position a fan near the wall or open a window for better air circulation.
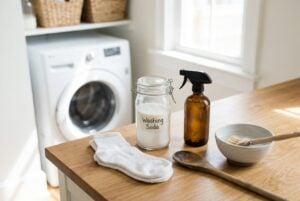
Dealing with White Water Stains
If the water marks are caused by hard water, which leaves behind chalky white residue, baking soda is great for tackling tough stains like this. To create the paste, mix baking soda with a small amount of water until a thick consistency forms. Gently apply the paste to the affected area and let it sit for 15 to 20 minutes. Afterward, wipe the paste away with a damp cloth and check if the stain has faded. This method may need to be repeated for particularly stubborn marks.
How to paint over water stains?
Preparing the Surface
Before repainting over water stains, the wall must be properly prepared. Any loose or peeling paint should be removed, and the area should be sanded to create a smooth surface. The wall should be thoroughly cleaned and allowed to dry completely to prevent moisture from interfering with the paint application. Applying a stain-blocking primer will help prevent the stain from bleeding through the new paint.
Choosing the Right Primer and Paint
Selecting the right primer is essential for long-lasting results. An oil-based primer is recommended for water stains, as it provides better coverage and prevents the stain from resurfacing. If the area is prone to moisture, choosing a primer with mould-resistant properties is a good precaution. When selecting paint, moisture-resistant options such as semi-gloss or satin finishes are ideal for kitchens and bathrooms, as they are easier to clean and less likely to absorb moisture.
How to prevent water stains on interior and external walls
Creating a protective barrier against water damage starts with proper exterior wall maintenance. Regular checks of gutters, downspouts, and roof flashing prevent water from seeping into your living space. Apply water-repellent sealants to exterior surfaces during dry weather, ensuring enough time for complete absorption.
Inside your home, tackle condensation at its source. Set your air conditioning to a cool setting in humid areas and maintain consistent temperatures to minimize moisture buildup. For severe cases, consider installing a vapor barrier behind walls in wet zones like bathrooms and kitchens.
Check window seals and exterior cracks every few months, as these provide direct paths for water infiltration. A patch of caulk applied early can prevent extensive damage later. For painted surfaces, an eggshell finish offers better resistance to water marks than standard emulsion paint.
Regular Wall Maintenance
| Maintenance Task | Why It’s Important | Recommended Frequency |
|---|---|---|
| Check walls for stains | Detects water marks early before they become severe. | Monthly |
| Address leaks quickly | Prevents further water damage and costly repairs. | As soon as detected |
| Clean walls regularly | Removes dirt, moisture buildup, and potential stains. | Every 2-3 months |
| Repair paint or wallpaper | Maintains wall protection and prevents moisture penetration. | As needed |
When to Call a Professional
Recognizing the right moment to seek expert help can save you thousands in repairs. Contact a professional immediately when water marks span more than a square meter or appear in multiple rooms. These situations often signal deeper structural issues beyond surface-level damage.
Time plays a critical role in preventing extensive damage. Water marks accompanied by bubbling paint or peeling wallpaper demand swift professional assessment, typically within 24-48 hours of discovery. For example, a seemingly minor ceiling stain could indicate a compromised roof structure requiring specialized expertise.
Pay special attention to water marks near electrical outlets or fixtures, as these pose serious safety risks. Professional evaluation becomes necessary when stains appear dark brown or show signs of spreading, particularly in load-bearing walls.
Frequently asked questions
Can’t I just paint over condensation stains?
Simply painting over water stains without proper preparation will lead to disappointing results. The source of the problem must be fixed before any painting begins, or the stains will reappear through your fresh coat.
Start by applying a specialized stain-blocking primer to create a barrier between the stained surface and your new paint. Regular wall paint alone won’t suffice, as water-based products allow stains to bleed through.
For the best result, use oil-based primers specifically designed for water damage. Allow each layer to dry completely before applying a second coat. Remember that painting the entire wall, rather than just the stained area, ensures a uniform finish and prevents noticeable patches from forming.
How to get rid of water stains on ceiling?
Tackling ceiling water stains requires swift action and proper technique. Start by mixing a cleaning solution of one part bleach to three parts warm water. Using protective gloves and eyewear, apply this mixture gently with a soft sponge to prevent ceiling damage.
For stubborn marks, natural alternatives prove effective. A paste made from baking soda and water can lift persistent stains when left on the surface for 20 minutes. White vinegar, diluted equally with water, works particularly well on mineral deposits that create yellowish spots. Position a fan nearby to speed up the drying process and ensure proper ventilation throughout the cleaning procedure.
Water marks on walls can be more than just an eyesore—they often signal underlying moisture problems that need attention. Whether caused by leaks, condensation, or rising damp, addressing the source of water is essential before attempting any cleaning or repainting.
At Wecasa, we provide professional home cleaning services to make your life easier. We know how busy and hectic things can get—that’s why we’re here to help! Simply book your cleaning session, sit back, and relax while our expert cleaners take care of everything. A spotless home has never been this effortless!