Résumer cet article avec :
 Claude
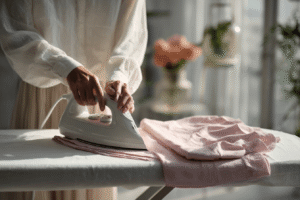
Feeling a bit overwhelmed by that mounting pile of wrinkled clothes? We’ve all been there. At Wecasa, we connect you with skilled professionals who can tackle your household tasks, but we also believe in empowering you with the knowledge to master everyday skills like ironing.

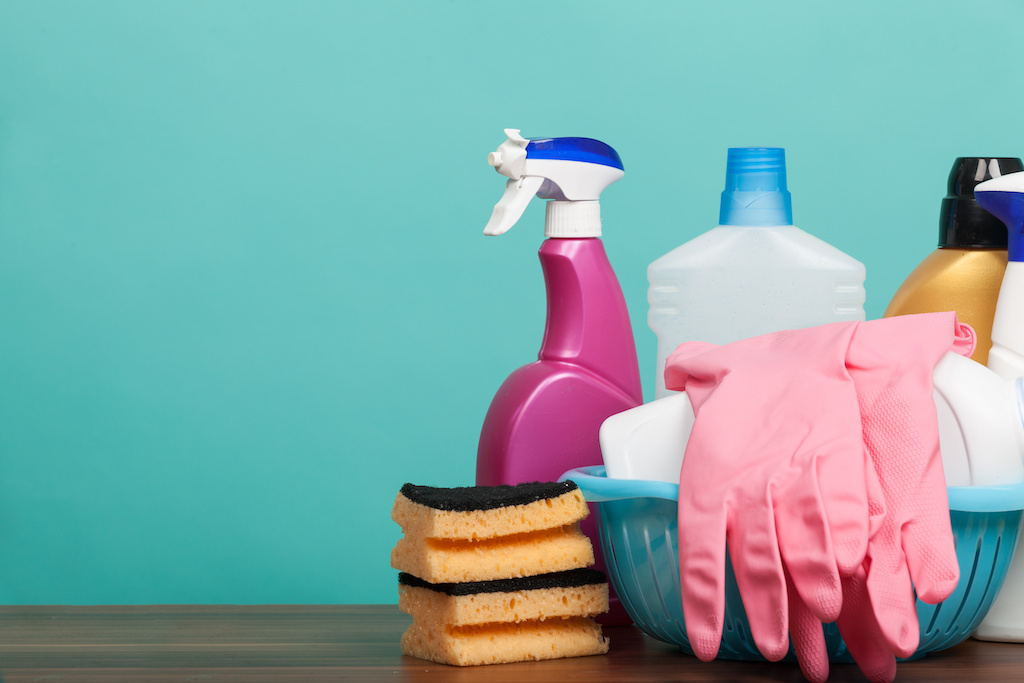
What You Need: Essential Ironing Kit
Choosing the Right Iron for Your Needs
The foundation of brilliant ironing starts with selecting a decent iron that matches your household requirements. Consider these key factors when choosing:
Steam vs Dry Irons:
- Steam irons work brilliantly for cotton and stubborn creases, using moisture to penetrate fabric fibres
- Dry irons suit delicate materials like silk and polyester, preventing potential water damage
Essential Features:
- Adjustable temperature settings for different fabric types
- Non-stick soleplate (ceramic or stainless steel) for smooth gliding
- Comfortable weight – heavier irons require less pressure but can tire your arm
Pro Tip: Choose an iron with a decent water reservoir if you tackle large loads regularly – you’ll spend less time refilling and more time achieving professional results.
Ironing Board Setup and Alternatives
Setting up your ironing board properly ensures comfortable, efficient pressing. Adjust the height to your hip level – this prevents back strain during longer sessions.
Quick Alternatives When Space is Tight:
| Surface | Setup Method | Best For |
|---|---|---|
| Kitchen counter | Thick towel + heat-resistant mat | Quick touch-ups |
| Dining table | Two towels for extra padding | Larger garments |
| Washing machine top | Secure towel base | Small items |
Pro Tip: Keep an ironing blanket handy – these portable, heat-resistant mats transform any flat surface into an ironing station. Perfect for students or anyone with limited storage space.
Remember to always protect surfaces with proper heat barriers. Your kitchen counter wasn’t designed for hot irons, but with the right setup, it works brilliantly in a pinch.
Must-Have Accessories and Tools
Beyond your iron and board, several accessories transform good ironing into exceptional results. A spray bottle helps dampen stubborn creases on cotton and linen – fill it with distilled water to prevent mineral buildup on fabrics.
Essential accessories include:
- Pressing cloth – protects delicate fabrics from direct heat and prevents accidental melting
- Starch spray – creates that crisp finish on shirts and ensures clothes hold their shape longer
- Iron cleaner – cleans your iron and removes buildup from your iron plate, preventing burn marks on garments
Pro Tip: Keep a damp cloth nearby for quick touch-ups and cleaning your iron’s soleplate whilst it’s still warm. This simple habit prevents residue from transferring to your next garment and extends your iron’s lifespan significantly.
Getting Started: Ironing Preparation
Reading Care Labels Like a Pro
Those tiny symbols on clothing tags aren’t hieroglyphics – they’re your roadmap to preventing laundry disasters. Care labels follow a universal system that tells you exactly how to treat each garment.
The Essential Skill: Look for five key symbols in order – washing, bleaching, drying, ironing, and dry cleaning. The iron symbol shows dots indicating temperature: one dot means low temperature (silk, synthetics), two dots for medium heat (wool blends), and three dots for high heat (cotton, linen).
| Symbol | Temperature | Best for |
|---|---|---|
| Iron + 1 dot | 110°C | Silk, acetate |
| Iron + 2 dots | 150°C | Polyester, wool |
| Iron + 3 dots | 200°C | Cotton, linen |
Top Tip: When in doubt, start with the lowest setting and work up. A crossed-out iron means skip ironing entirely – grab a steamer instead for delicate fabrics that wrinkle easily.
Sorting Clothes by Fabric and Temperature
Smart sorting saves time and prevents fabric disasters. Group garments by temperature requirements before you switch on – this means starting with delicate synthetics and working up to robust cottons.
Fabric Temperature Categories:
| Low Heat (110°C) | Medium Heat (150°C) | High Heat (200°C) |
|---|---|---|
| Polyester, nylon | Wool blends, silk | Cotton, linen |
| Acetate, lycra | Mixed fabrics | Denim, canvas |
Quick Sorting Method:
- Check care labels first – one dot items go in the low pile
- Separate by colour within each temperature group to prevent accidents
- Keep heavily soiled items for last to avoid transferring marks
Pro Tip: Create a simple sorting system using three laundry baskets labelled low, medium, and high heat. This speeds up your ironing sessions and helps other household members sort correctly too.
How to Use an Iron: Step-by-Step Guide
Setting Up Your Iron Safely
First thing – check your iron’s condition before plugging in. Inspect the cord for damage and ensure the soleplate is clean using white vinegar if needed.
Safe Setup Steps:
- Position your ironing board near a plug socket with plenty of cord slack
- Fill the water tank with distilled water, leaving space for steam expansion
- Set temperature according to your fabric pile – start low and work up
- Ensure good lighting and ventilation in your workspace
Never leave your iron unattended when switched on. If you need to step away, position the iron vertically or switch off completely. People often rush this setup, but taking extra attention here prevents accidents and protects your clothes.
Top Tip: Test your iron’s heat on a spare cloth first – this simple check prevents fabric disasters and ensures you’re ready for professional results every time.
Temperature Settings for Different Fabrics
Getting your temperature right makes the difference between crisp, professional-looking clothes and fabric disasters. Each material responds differently to heat – synthetics can melt whilst natural fibres need higher temperatures to release stubborn creases.
The Golden Rule: Always check the care label first, then start low and work up if needed. Your iron’s temperature dial typically shows fabric types or numbered settings corresponding to heat levels.
| Fabric Type | Temperature | Key Tips |
|---|---|---|
| Silk, acetate | Low (110°C) | Iron inside out, no steam |
| Polyester, nylon | Low-Medium (130°C) | Use pressing cloth, avoid shine |
| Wool blends | Medium (150°C) | Light steam, gentle pressure |
| Cotton, linen | High (200°C) | Use steam, press firmly |
Remember: Blended fabrics follow the most delicate fibre’s requirements. When switching between temperatures, allow your iron five minutes to adjust properly.
Top Tip: Test on an inconspicuous area first – shirt tails or inside seams work perfectly for this quick safety check.
Basic Ironing Technique and Movement
Master the art of smooth, controlled movements to transform your ironing from chore to satisfaction. The secret lies in steady, deliberate gliding rather than pressing hard – think of it as guiding your iron, not wrestling with it.
Essential Movement Techniques:
- Long, straight strokes work best – avoid short, choppy movements that create new creases
- Move from top to bottom on garments, working with gravity rather than against it
- Glide, don’t press – let the iron’s weight and heat do the work whilst you control direction
- Keep the iron moving – lingering in one spot risks scorching or creating shine
For different fabric types, adjust your speed accordingly. Delicate materials need gentler, quicker passes whilst robust cottons can handle slower, more deliberate movements.
Pro Tip: Practice the “lift and place” technique – slightly lift the iron between sections rather than dragging it across seams or buttons. This prevents snagging and ensures even coverage across your entire garment.
Can You Iron Wet Clothes? Damp vs Dry
Here’s something that might surprise you: ironing slightly damp clothes actually delivers better results than bone-dry garments. Damp fabrics relax more easily under heat, requiring less pressure and lower temperatures to banish stubborn creases.
Key Differences:
- Damp clothes: Easier to smooth, faster results, less heat needed
- Dry clothes: Require higher temperatures, more passes, often need re-dampening
- Soaking wet: Avoid completely – creates excessive steam and potential water marks
The Sweet Spot: Remove clothes from your washing line when they’re about 80% dry. Cotton and linen work brilliantly this way, whilst delicate fabrics like silk should be completely dry to prevent water staining.
Remember to adjust your iron’s temperature accordingly – damp fabrics need gentler heat settings to prevent scorching whilst achieving that crisp, professional finish you’re after.
How to Iron Clothes: Garment-Specific Guide
How to Iron a Shirt: Collar to Cuff
Shirts demand a specific sequence for professional results. Start with the collar – iron the underside first, then flip and press the top. This prevents visible creases along the fold line.
Move to the cuffs next. Unbutton them completely and lay flat on your board. Iron the inside surface, then flip for the outside – this technique ensures crisp edges without awkward bunching.
Tackle the sleeves systematically: place each sleeve flat, aligning the seam, and iron from shoulder to cuff using steady strokes. Iron both sides of each sleeve to eliminate all wrinkles.
Finish with the body panels – start with the button side, work around the back, then complete with the buttonhole panel. Navigate carefully around buttons to avoid damage.
Top Tip: For professional cleaning results, slightly dampen stubborn collar and cuff areas before ironing – they’ll crisp up beautifully with less effort.
Ironing Trousers and Pants Perfectly
Trousers require a completely different approach from shirts – positioning and sequence matter enormously for sharp, tailored results.
Start with preparation: turn trousers inside out and begin with the pockets. Lay each pocket flat against your board and press gently to prevent unsightly outlines showing through.
Master the leg technique: lay one trouser leg flat with seams aligned on either side. Iron from waistband to hem using steady, downward strokes. Flip and repeat on the opposite side.
| Trouser Type | Crease Needed? | Key Focus |
|---|---|---|
| Dress trousers | Sharp front crease | Precision alignment |
| Chinos | Flat finish | Smooth surface |
| Casual trousers | Light press only | Remove wrinkles |
Create professional creases by folding the leg lengthwise, aligning inseams perfectly, then pressing along the front edge.
Pro Tip: For domestic cleaning services that include ironing, our professionals use this exact technique – hang your freshly pressed trousers immediately to maintain those crisp lines.
T-Shirts and Casual Wear
T-shirts and casual garments need gentler treatment than formal shirts – the relaxed fabrics respond brilliantly to a lighter touch.
Start with the shoulders: lay the t-shirt flat and position one shoulder over your board’s narrow end. Work from the neckline outward using gentle strokes.
Handle printed designs carefully – turn graphic tees inside out or use a pressing cloth to prevent heat damage to logos and artwork.
Follow this sequence for best results:
- Iron collar area first (if present)
- Press each sleeve flat, avoiding harsh creases
- Smooth the front panel, working around any prints
- Finish with the back panel
Top Tip: Casual wear benefits from professional cleaning services – our team knows exactly how to handle delicate prints and stretchy fabrics without causing damage or unwanted shine.
Best Way to Iron Different Fabric Types
Cotton and Linen: High Heat Techniques
Cotton and linen fabrics thrive under high heat settings – these natural fibres can handle temperatures up to 200°C without damage.
Set your iron to maximum heat and ensure the steam function is activated. Both fabrics respond exceptionally well to moisture, so iron whilst slightly damp for optimal results.
| Fabric | Temperature | Steam Setting | Key Technique |
|---|---|---|---|
| Cotton | 200°C | High steam | Iron while damp |
| Linen | 230°C | Maximum steam | Use pressing cloth |
For stubborn creases, apply extra pressure with steady strokes. Linen particularly benefits from ironing on the reverse side to prevent shine developing on the surface.
Top Tip: Keep a spray bottle handy filled with clean water – a light mist transforms even the most stubborn wrinkles into smooth, crisp fabric that looks freshly professionally cleaned.
Delicate Fabrics: Silk and Synthetics
Silk and synthetic fabrics demand extra care – these materials can easily melt, scorch, or lose their lustre under excessive heat.
Set your iron to the coolest setting possible, typically around 135-150°C. Most irons feature a dedicated silk or delicate setting that works perfectly for these materials.
| Fabric Type | Temperature | Steam | Special Care |
|---|---|---|---|
| Pure silk | 150°C max | No steam | Always use pressing cloth |
| Silk blends | 175°C max | Light steam | Iron inside out |
| Polyester/Acetate | 135°C | Minimal steam | Keep iron moving |
Always iron these fabrics inside out and place a clean cotton cloth between your iron and the garment. Press gently rather than sliding – this prevents stretching and shine marks.
Pro Tip: For valuable silk garments or tricky synthetic pieces, consider booking professional cleaning services – our experts handle delicate fabrics daily and know exactly how to preserve their quality.
Ironing for Beginners: Common Mistakes
We’ve all been there – you’re rushing to get ready and suddenly notice scorch marks or stubborn creases that weren’t there before. Don’t worry, these mishaps happen to everyone starting their ironing journey.
Here are the most frequent blunders beginners make:
- Skipping the fabric check – Always read care labels before heating up your iron
- Using dirty equipment – Clean your iron’s plate regularly to prevent staining clothes
- Ironing over stains – Heat sets dirt permanently into fabric fibres
- Wrong temperature settings – Too hot scorches delicate materials, too cool leaves wrinkles behind
- Rushing the process – Taking shortcuts creates more work later
The biggest mistake? Ironing clothes straight from the tumble dryer when they’re bone dry. Slightly damp garments iron much more easily and achieve better results.
Pro Tip: Start with garments requiring the lowest heat first – your iron heats up faster than it cools down, saving you precious time during busy mornings.
How to Iron Without an Iron: Alternatives
Stuck without an iron? No worries – several household items work brilliantly as alternatives when you need to iron without an iron.
Hair straighteners tackle collar creases and small areas perfectly. Set them on medium heat and glide over problem spots – just ensure they’re clean first.
Your tumble dryer becomes a steam chamber with this trick: toss wrinkled clothes in with a damp towel for 10-15 minutes on medium heat. The steam works wonders on cotton and casual wear.
| Method | Best For | Time Needed |
|---|---|---|
| Hair straightener | Collars, cuffs | 2-3 minutes |
| Shower steam | Full garments | 15 minutes |
| Damp towel press | Light wrinkles | 5 minutes |
Top Tip: Hang clothes in your bathroom whilst showering – the natural steam relaxes fibres without any effort from you.